Sewing a zipper into a small pouch is easier than ever with handy in-the-hoop designs! Your choice of fabrics makes each project unique. Follow the step-by-step instructions below to make your own!
Supplies
To create your pouch, you'll need:
- In-the-hoop zipper pouch embroidery design (we're stitching the Aperture Priority Pouch)
- Linen, twill or quilter's cotton fabric for pouch front and back, and any applique pieces (for the camera purse, we used 1/2 yard black fabric for the main camera fabric, 1/4 yard patterned fabric for the camera stripe, and 1/4 yard gray fabric for the camera lens)
- Tear-away stabilizer
- Elastic, cord or ribbon
- All purpose zipper (11"+ zipper for small size, or 13"+ zipper for large size)
- Temporary spray adhesive
- Scissors
- Masking tape
- Printed templates of the dieline files, which come with the design and have DL in the filename (here's how to print dieline templates, or stitch if you don't have embroidery software)
Designs Used
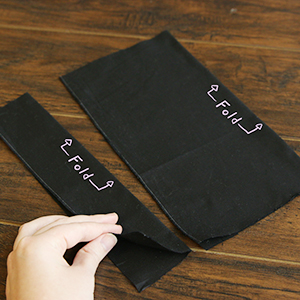
The front of the purse is made up of two main fabric pieces, each folded double to create a clean edge next to the zipper.
To begin preparing the fabric pieces, cut two rectangles out of the main fabric (small size: 8"x8" & 8"x3"; large size: 10"x10" & 10"x4").
Fold both rectangles in half with wrong sides together.
Press the folded edge, and spray the wrong side of the fabric with temporary adhesive to hold the folded fabric together. Adhering the two folded sides together will help prevent shifting, and make the pieces easier to cut.
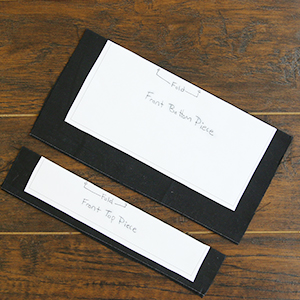
When the design is downloaded, there will be four files. One is the embroidery file, and the other three are dieline files (labeled with a DL). Print them out using embroidery software, and locate the top and bottom front pieces.
Cut around the shapes, and spray the back side of the paper dielines with temporary adhesive, and smooth them onto the folded fabric. Make sure one long side of each dieline ends up on the folded edge.
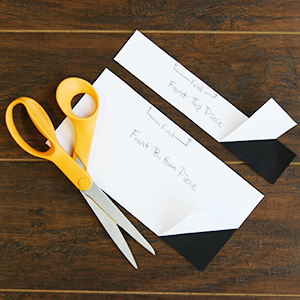
Then cut the two front pieces, leaving the folded edges intact.
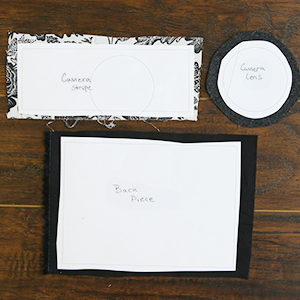
Next, cut out the fabric shapes for the back piece and any applique pieces. Simply spray the paper dielines with temporary adhesive, and smooth them onto the right sides of the chosen fabric. These pieces will simply be flat fabric, and have no folded edges.
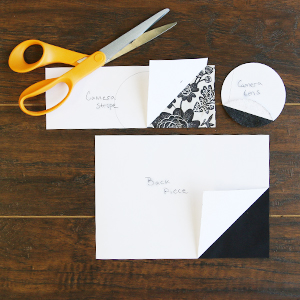
Cut out the shapes.
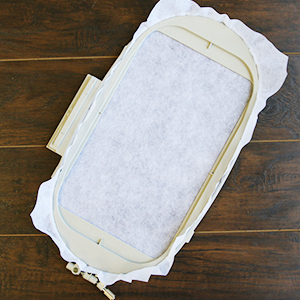
Once all the fabric pieces are prepared, hoop a piece of tearaway stabilizer tightly. Make sure the stabilizer is taut in the hoop, and has no wrinkles.
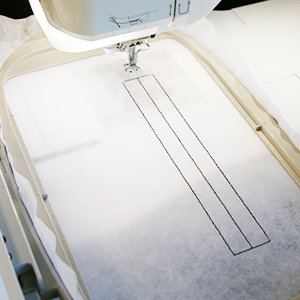
Load the embroidery file onto the machine, and begin to embroider the design. The first thing to sew will be the "zipper dieline." This marks the place where the zipper will be placed on the stabilizer.
The zipper dieline sews a box with a center line through the middle. To place the zipper correctly, close the zipper, and match up the center of the zipper (the teeth that zip and unzip) with the sewn center line.
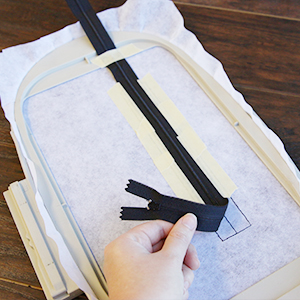
Make sure the wrong side of the zipper is against the stabilizer, and tape it in place. The zipper should hang over on both sides, and will be trimmed away later.
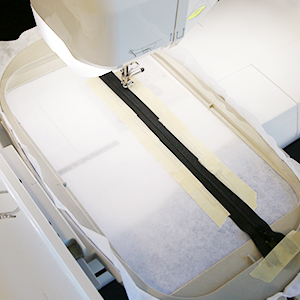
Now that the zipper is placed, place the hoop back on the machine, and embroider the "zipper tackdown" step. This will adhere the zipper to the stabilizer, and hold it in place for the remainder of the design.
Don't worry if it sews over the tape -- the tape can be easily torn away from around the stitches.
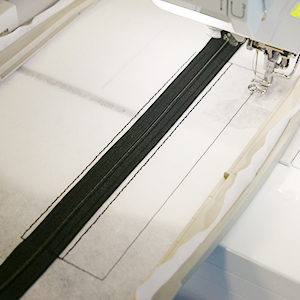
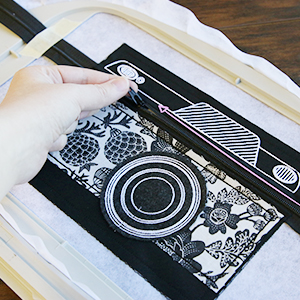
Carefully remove the tape, and embroider the "top front piece tackdown" step. This will sew out an outline where the top front fabric piece will go.
Spray one side of the folded, top front fabric piece (the skinnier folded piece) with temporary adhesive. With the folded edge alongside the zipper, smooth the fabric piece inside the sewn dieline shape.
Then continue to embroider the "top front piece tackdown" step.
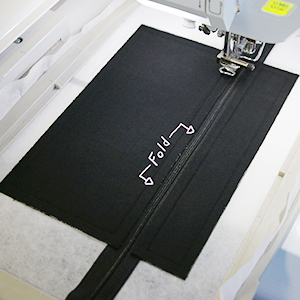
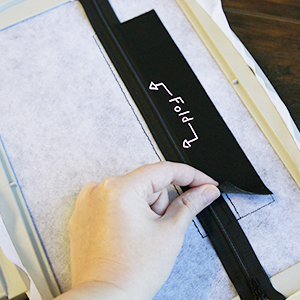
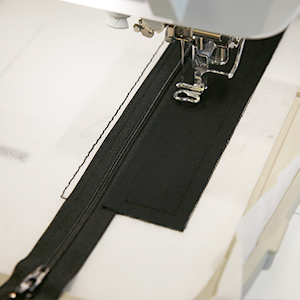
Repeat the previous steps to embroider the dieline, place the fabric, and embroider the tackdown for the bottom front fabric piece. Make sure the folded edge is alongside the zipper.
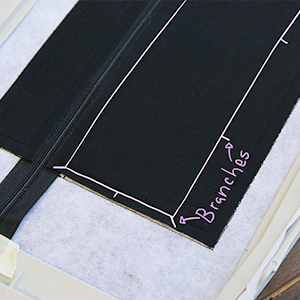
If your design has applique pieces, you'll add these next. For this design, embroider the "camera stripe dieline," and locate the "branches" that extend around the sewn shape. These will show where to place the fabric, and allow the stitching to be more hidden under the raw edge of the fabric piece.

Spray the back side of the camera stripe fabric piece with temporary adhesive, and place it so the edges of the fabric match up with the tips of the embroidered branches.
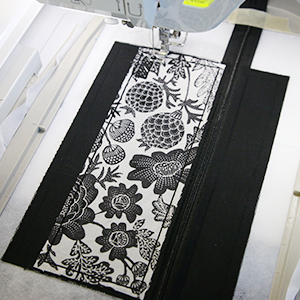
Once the camera stripe fabric is smoothed in place, embroider both the "camera stripe tackdown" and the "camera stripe detail" steps.
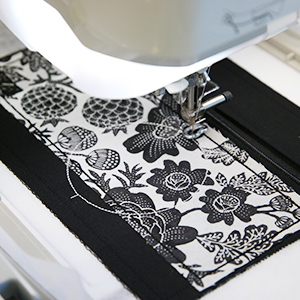
Then repeat to embroider the "camera lens" dieline which will also have "branches."
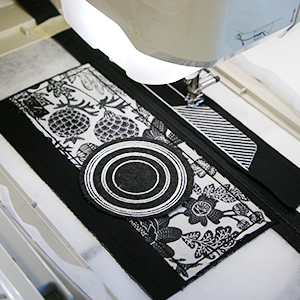
Spray and place the fabric onto the design. Then embroider the "camera lens tackdown" and the "camera detail." Stop before sewing the "finishing seam."
Some zipper pouch designs have more applique pieces than others. Simply follow the color change sheet closely, and add each fabric piece over the sewn dieline before embroidering the corresponding tackdown step.
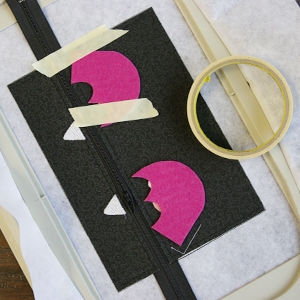
The Batty Halloween Zipper Pouch has stiff felt wings that stitch into the side seams. After stitching the front detail but before adding the back piece, lay the wings in place using the "wing placement indicator" stitch.

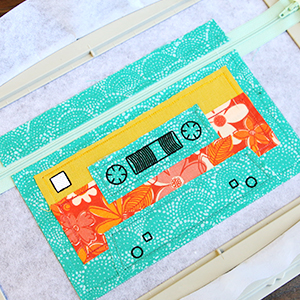
Not all zipper pouches have applique pieces to apply. For example, the Floral Fashions Zipper Purse has only embroidery on the front of the pouch, so you won't need to apply any applique pieces. The color change sheet for the design you are stitching will be your guide. In this case, you will skip the applique step.
After all the front decoration is added, it's time to add the straps and back piece.
It is very important to move the slider (also called the pull tab) of the zipper to the center of the design. This will leave the zipper about half open and will allow the slider to be a part of the zipper purse, so it can be opened and closed.
If you do not move the slider, the purse will be permanently stuck closed, so do not forget!
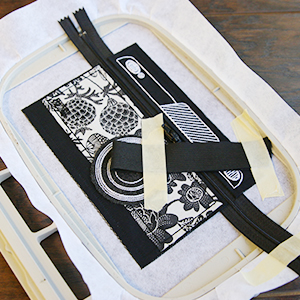
Then choose if you would like a wrist strap or shoulder strap added onto the zipper purse. /p>
For the wrist strap, cut a piece of elastic or ribbon 8"-12" long. Fold it in half, and place the looped end on the inside of the purse (so the raw edges hang over the edge). Tape it in place.
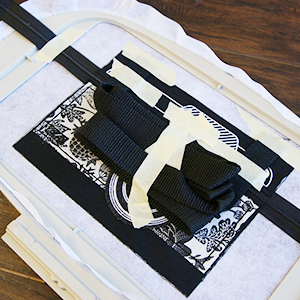
For the shoulder strap, cut a piece of cord 40"-70" long.
Fold up the majority of the strap, and tape it as flat as possible on the inside of the camera shape. Then tape the two edges in place so that the raw edge is outside the camera on the stabilizer.

Place the back fabric on top of everything with the right side facing down. Match up the edges with the edges of the front fabric pieces, and tape it in place along all four sides.
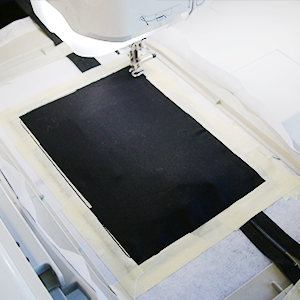
Then finish the embroidery by stitching the final "finishing seam." This will sew out the final shape of the camera, and adhere the back, front, and straps together.
Once the embroidery is finished, tear away the excess stabilizer from around the design. Then carefully remove the stabilizer from the back of the embroidery as well to uncover the zipper opening, and make the bag more flexible.
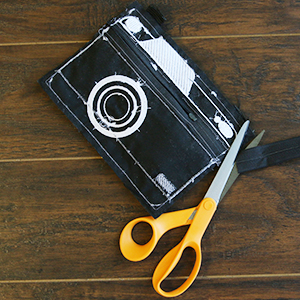
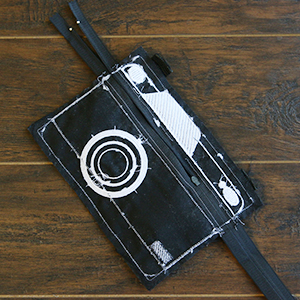
Using scissors, carefully cut off the extra zipper length on either side of the purse.
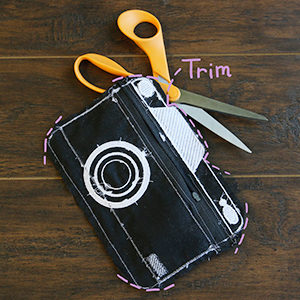
Then trim away the seam allowance around any corners, curves, or indentation. Cutting close to the seam will make the shapes cleaner once the purse is turned. Make sure not to cut the finishing seam.
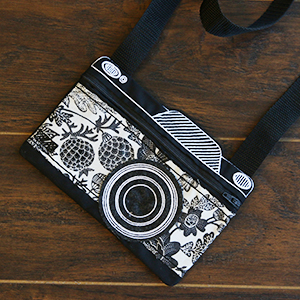
Finally, turn the purse right side out through the open zipper. Remove any tape, and press the edges.


