Follow along with these instructions to make your own embroidered zippered coin purse project!
Supplies
For our coin purse we'll need some vinyl, a polyester zipper, D-rings or purse clips, fabric for the lining, and a scribbles-style embroidery design of your choice.
Designs Used
When I went to my local fabric store, I found the selection of vinyl to be somewhat small and in the drab neutral color zone. Luckily I dug around and found some blue.
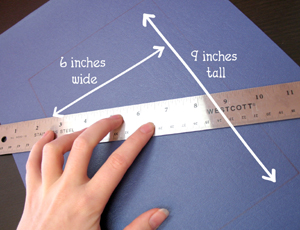
Take a piece of your vinyl, and leaving some space around your markings (for hooping), measure a rectangle 9 x 6 inches.
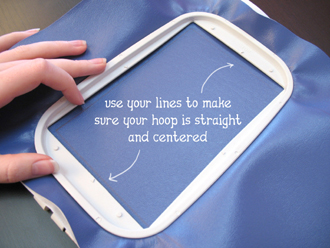
We're going to be folding this purse roughly in half, so center the hoop so the design can go near the top middle of your vinyl. Use the lines you drew for your outline to keep everything centered and straight.
Even though the vinyl is pretty thick, I advise that you use cut away stabilizer just to make sure the stitches are nice and neat.

Load the design and watch it sew. I chose the little koi fish for my purse. It's nice and light, goes well with the blue vinyl, and might be a lucky symbol.
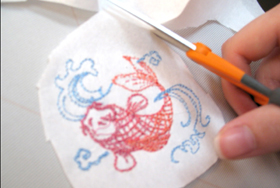
Trim any threads and snip away the extra stabilizer on the back.
If you'd like your purse to have a cute little strap to clip it to things, cut a strip of vinyl roughly one inch across (or however wide your D-ring or clip happens to be). Fold it in half over the edge of the ring and sew a seam around the edges to keep the clip snug.
This will leave the vinyl's raw edge showing, and I'm fond of that look. I wouldn't recommend folding over the vinyl to get a clean edge, because vinyl can get pretty bulky pretty fast, and it wont' sew into your purse well. If you want something with a cleaner edge, you can use a thinner fabric. The fabric for your lining would probably work well and keep the purse coordinated, if you don't want to go the vinyl strap route.

Cut the embroidered vinyl along the rectangle outline, then flip it over to the back. Measure a one inch center, then measure in 1/2 inch from all corners. Use the markings to make taper lines from the center to the tapered corners, and trim along these lines. Your rectangle shouldn't exactly be a rectangle any more, and that's what we're going for.
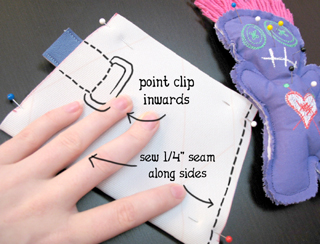
Once you've cut the vinyl piece, fold it together with the purse design side in. If you made a strap for your purse, point it inwards and pin it in place. You can see the little voodoo pincushion dude is quite handy around the studio.
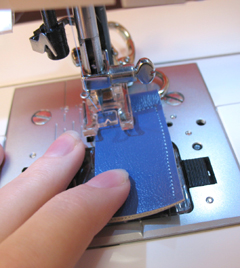
Once you're all pinned and ready, sew a 1/4 inch seam down the sides.
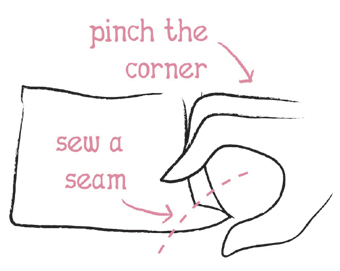
In order to make the nice folded-in bag corners, open up the purse, then pinch the corner flat, about 3/4 inch in, making sure you keep the seam straight.
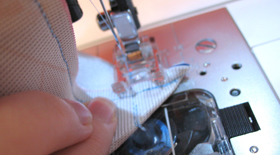
Sew in about 3/4 to 1 inch from the pinched corner, depending on how wide you want the bottom of the purse to be.
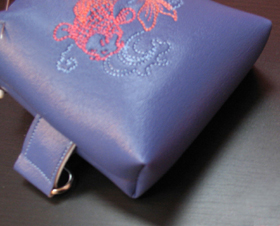
Turn the purse right side out. This is what the corners should look like. If you find them too narrow, you can turn it back inside out and sew up a little father until you're happy with the result. You can cut off the excess on the corners when you feel you've found the right size.
And now, on to the lining....

Cut a rectangle from the lining fabric that's a half inch smaller in all directions than the vinyl piece. This means my lining is 8.5 inches long and 5.5 inches wide. Follow the same directions as you did to make the vinyl purse. If you want to taper the edges of the lining to match, I'd cut in about 3/8 inches in from the corners, and leave the middle an inch wide.
Fold the lining in half, right sides together, sew a seam along the edges, and pinch the corners in about 1/4 inch less than the vinyl purse.
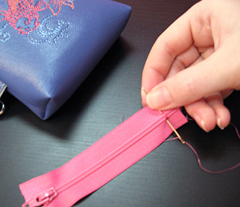
Measure the opening of your little purse, and trim the zipper to size. To shorten the zipper, sew over the zipper teeth about 1/2 inch away from the end of it. You can either do this by hand or use your machine, but if you use a machine, make sure you have a polyester zipper. If you try to sew over metal zipper teeth with your machine, your needle won't be with you very long.
I'm sometimes clumsy with my machine, so I shortened my zipper by hand.
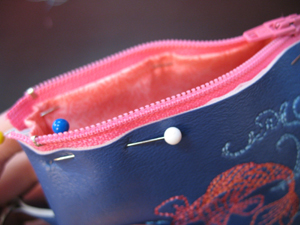
Put the lining inside the purse and fold the edges over so it looks nice and finished when you sew it together. Pin it in with your zipper, making the lining the inner-most layer.
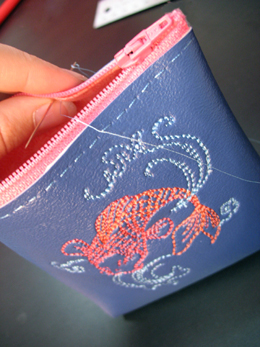
Since this purse is so itty-bitty, it's hard to fit under the sewing machine to stitch the lining and zipper in. Instead I used some contrast thread that matched my design and did a cute little hand stitch across the top.

And now we have a beautiful little coin purse!


