


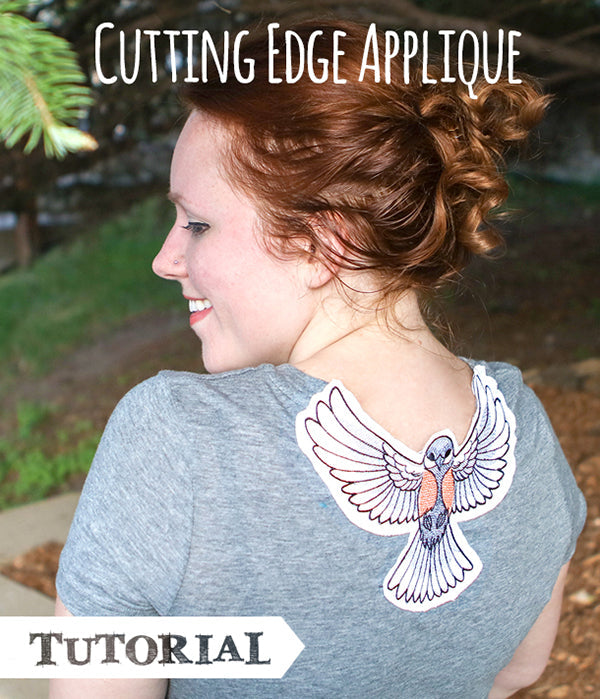
Add some unique flair to your wardrobe and accessories with this free-spirited, cutting-edge design! While edge applique designs can be used on anything from totes to towels and more, today we will show how to use it for embellishing the back of a T-shirt.
Supplies & Materials:
Supplies
To craft your cutting-edge applique shirt, you will need:
- Put a Bird on It (Applique) embroidery design
- Fabric for your applique (I chose a white twill)
- T-shirt
- Printed templates of the dieline files, which come with the design and have "DL" in the filename ( here's how to print dieline templates, or stitch if you don't have software)
- Medium weight cutaway stabilizer OR sheer mesh stabilizer
- Air erase marking pen
- Temporary spray adhesive
- Scissors
- Clips
- Seam ripper
The designs used in this tutorial include:
Gather Materials:
Let's start with those printed dieline templates...
Lightly spray the back of your template with temporary spray adhesive and put it on your chosen fabric, cutting out your bird shape along the printed dieline.
If you are using the largest Put a Bird on It design, you will need to tape the two printed pieces of paper together. Make sure the horizon lines match up together before taping them down.

Next, use your template to determine the position of your applique. Use your air erase pen to mark the vertical and horizontal access points on your shirt fabric. These will help position your hoop perfectly later.

This may be the most important part of the process: Stabilizing your fabric to ensure a proper sewout.
Turn your T-shirt inside out, or flip your fabric over to the back side. Spray your cutaway stabilizer with temporary spray adhesive and line it up with your fabric. Leave several inches of stabilizer above the neckline to help you hoop your design area centered. Use your embroidery hoop to help with placement. Smooth the stabilizer onto your fabric.

Hooping a T-shirt can be tricky, and it mostly depends on your design size and the size of hoop you are using. If you are using the largest design on a larger shirt you may be able to hoop your tee and fold up the sides with clips, without having to open the side seams. Do this by inserting your top hoop piece into your inside-out shirt. Make sure to line up your pen marks so the crosshairs of the hoop align with your marks. Press the top of the hoop down into the bottom securely and make sure both fabric and stabilizer are hooped taut.
Once the shirt is hooped, slide it into place on your machine, then roll or fold back the sides, keeping them in place with your clips.

You can double check your positioning in your hoop using your template, to ensure you have everything set in the correct place.

If you are using a large hoop on a smaller T-shirt, you may need to open up a side seam to allow you to roll the excess fabric away for stitching. Do this carefully so it's easier to re-sew later.

Again, line up the crosshairs from your hoop to your fabric markings, then slide the hoop into place. After your hoop is attached to the machine use clips to fasten the extra fabric back.

Depending on how you hooped your shirt, you may need to rotate the design 90 degrees. I achieved this easily by rotating it to the left on my embroidery machine's menu.
Now you're ready to embroider!

Start Embroidering:
The first thing that sews is a dieline. Next, you'll need to lightly spray the back of your fabric bird piece with temporary spray adhesive, and place it so it completely covers the dieline. After that, another dieline will stitch to tack down your fabric before all the details stitch out.

Here is what your embroidered piece should look like when it's done stitching!

Flip over the embroidered area and carefully cut away the stabilizer. This medium weight cutaway stabilizer will soften as you wash it, so don't worry about it being too stiff.

It is OK to clip the dieline edge pieces, especially at the tips of the wings.

With the stabilizer cut away, your applique bird should look like this.

If you want to tailor your raw edge, now's a good time to do it! Use a smaller pair of scissors to get a closer trim to the embroidery.

Now for the fun part! hold back the applique edge and carefully cut away the fabric near the top of your embroidery.

You may need to switch to a smaller pair of scissors to get a more refined edge as you go. Take your time though -- a cleaner edge takes patience.

Here is the cutting edge applique, completed!

If you had to open your seam to hoop your shirt, now's a good time to stitch it back up! Use pins to create a straight line to stitch.

Your straight stitch should start slightly above where you opened the seam. Remember to lock the top and bottom stitches, so they don't rip open, then go back and use a zigzag stitch to ensure your seam stays strong.

There you have it! A delightful new piece to your wardrobe with a beautiful bird on it!

Put a cutting edge bird on anything your heart desires -- from T-shirts to towel edges, the tops of tote bags, and more! The only limit is your imagination.
