Combine different fabrics, textures, and styles together with embroidery to create dynamic designs for your projects! This tutorial will walk you through the steps for creating applique embroidery with a satin stitch border.
Designs Used
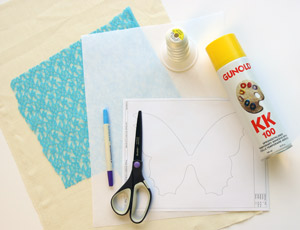
To craft your applique project, you will need:
- Applique embroidery design with a satin stitch border (I used the Lacy Butterfly design)
- Fabric or tight lace for your applique shape
- 40 wt. rayon thread
- Fabric for your project
- Printed templates of the dieline files
- Medium weight cutaway stabilizer
- Temporary spray adhesive
- Scissors
- Air erase marking pen (optional)
- Heavy Duty Water Soluble Stabilizer (For applique designs using furry fabric)
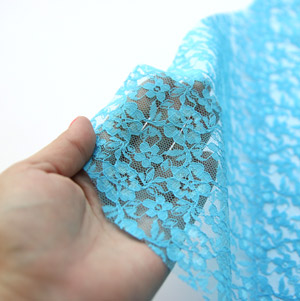
When choosing your applique fabric, the weave is an important factor to consider. We've used anything from felt, to quilters cotton, to lace! If you would like to use lace, though, make sure you choose a sturdier material to ensure best results.
Let's start with those printed dieline templates...
The dieline files for your applique design come in the zipped file folder and will have "DL" in the filename. You can either print the dielines as paper templates with the assistance of embroidery software, or stitch the dieline directly onto your chosen applique fabric. (Here's how if you need more details.)
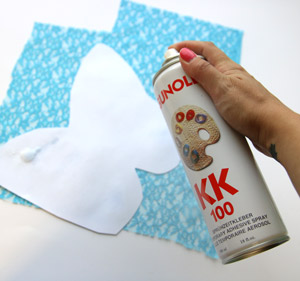
Lightly spray the back of your template with temporary spray adhesive and put it onto your fabric.
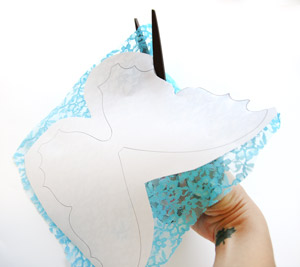
Carefully cut along the dieline to get your applique shape.
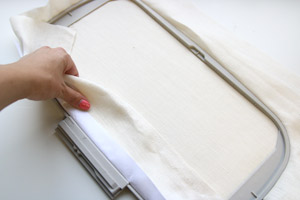
Next, spray your cutaway stabilizer with temporary spray adhesive and adhere it to the back of your project fabric, then hoop both your fabric and stabilizer taut together.
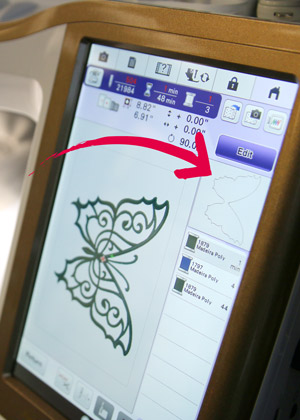
Load the embroidery design file onto your embroidery machine.
The first thing to stitch out is a dieline for your applique placement.
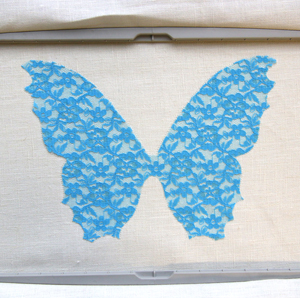
Next, your machine will stop so you can place the applique fabric piece. Lightly spray the fabric piece with temporary spray adhesive and carefully place it within the stitched dieline area.

A tackdown stitch will pin the applique fabric in place for the upcoming embroidered details.
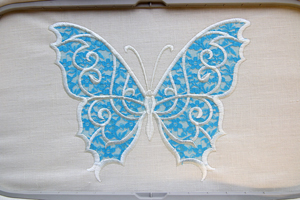
Another color change stop will allow you to choose the remaining colors of the embroidery design.
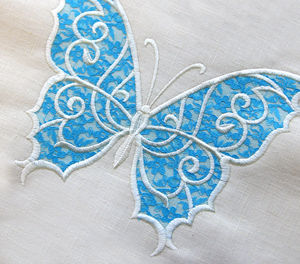
What you're left with is a beautiful and dynamic embroidery piece! Applique designs can be used on anything from apparel to accessories, decor, and more.
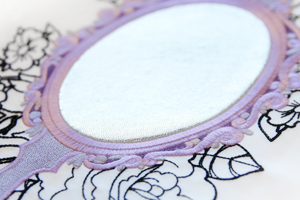
Special fabrics can bring a special dimension to your applique embroidery. This mirror design uses gold lamé to create a shiny effect!
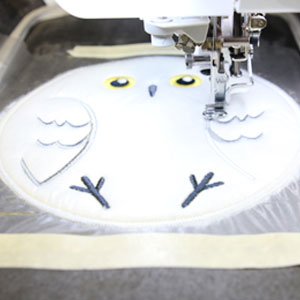
If you're using faux fur fabric for your applique, you'll want to add a water-soluble topping on top of the fabric before embroidering (we used Sulky Solvy). This will help prevent the stitches from sinking into the fabric.
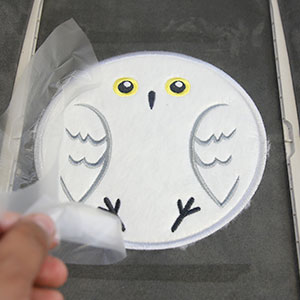
When you are finished stitching the designs, tear away the topping, and use water according to the package instructions to remove any remaining bits of water-soluble stabilizer.
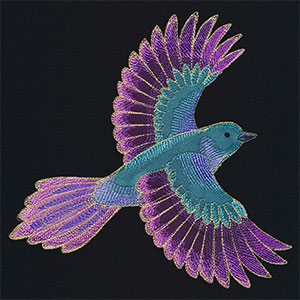
Some applique designs, such as this Brilliant Textures Bird, contain multiple applique pieces. Depending on the design, these pieces may overlap.
In this bird design, the fabric edges also are covered by semi-filled areas of stitching instead of a more traditional satin stitch border.
As with any applique design, follow the color change sheet and lay down each fabric piece after its placement dieline sews, then continue stitching to complete the design.


