
Printed placement templates are a helpful tool to make sure your machine embroidery ends up exactly where you want it. In this tutorial, we'll show you step-by-step how to precisely place your designs!
The designs used in this tutorial include: Fantasy Swirls Banner Frame Design Pack
Supplies:
- Fabric or materials
- Embroidery thread
- Temporary spray adhesive
- Quilter's ruler
- Scissors or rotary cutter
- Paper templates
- Medium weight cutaway stabilizer
-
Fabric marking tool
This tutorial will show you how to use printed templates to position and embroider multiple embroidery designs together on one project. A template, or printout, of a design is an excellent tool to help with placement. Print a template of the design using an embroidery software. Some designs can even be mirrored or rotated to fit together.
We recommend Wilcom's Hatch software which comes in different levels depending on what you'd like to use the software for. Hatch Organizer works well to view your designs, print dielines and templates, change design colors, and create basic design layouts. (This is an affiliate link. We may earn commission on purchases made through this link.

To start, gather your materials or fabric and prepare them for embroidery by drawing any shapes or ripping any seams you need to.
For best results, print templates for all your designs, so you can arrange them all together at the same time. Position the printed templates for the designs as desired on your project.
Embroidering multiple designs works best when marking and embroidering the centermost design first (if there is one). Using a fabric marking tool, mark the vertical and horizontal axis lines of the first design onto the fabric.

Then, extend the axis lines using a ruler to make a crosshair.
If desired, you can repeat these steps to position, mark, and extend the lines for all your chosen designs now, or you can do them one at a time. We recommend doing them one at a time especially for heavier designs, or if you're newer to embroidery. Sometimes designs shift while embroidering which can affect the placement of the other designs.

Cut a piece of stabilizer larger than your hoop. Spray the stabilizer with temporary spray adhesive and smooth it in place on the wrong side of the fabric behind where the design will sew. Using a separate piece of stabilizer for each of the designs helps to limit the amount of puckering.

Hoop the fabric and stabilizer together matching the drawn crosshairs up with the marks on the hoop. Make sure everything is hooped tightly and that there are no wrinkles or puckers in the fabric.

Attach the hoop to the embroidery machine and load the design on to the machine. Using the machine's controls, move the needle until it is right above the center of the drawn crosshair. This will ensure the design is sewing in the right place.

Follow the color change sheet and embroider the entire first design.

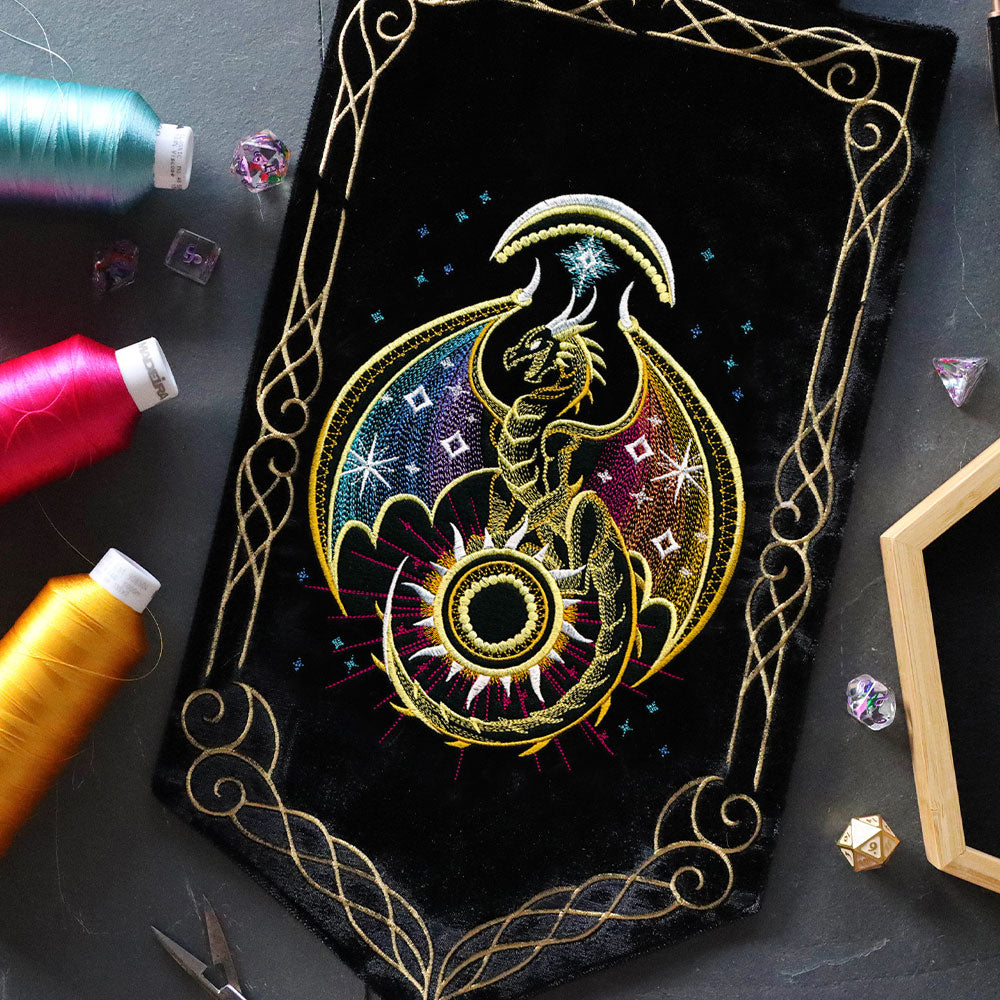
Finished embroidered dragon design with stabilizer backing being trimmed away using scissors.

Now that the first design has finished, arrange the printed templates again.
If you marked all the designs earlier skip this step.

Chose which design you would like to sew next, mark the axis lines, and extend them using a ruler. If preferred, you can position and mark all remaining designs now, or continue to do them one by one.
If you marked all the designs earlier skip this step.

Spray a piece of cutaway stabilizer that is bigger than the hoop with temporary spray adhesive. Then, smooth it onto the wrong side of your fabric behind where the next design it will embroider.
Hoop the fabric and stabilizer together matching the drawn crosshairs up with the marks on the hoop. Load the file onto the machine, and make sure to rotate or mirror designs as needed. Attach the hoop onto the machine, center the needle over the center of the crosshairs, and embroider the design.

Repeat the steps to position, mark, and embroider all of the designs in your project. Using multiple embroidery designs creates exciting and dynamic projects. Create beautiful apparel, lovely pillow, or even bags by using different designs together.
