We haven't met an embroiderer yet who wouldn't love a machine with a bigger stitching area. Every machine has its limits ... but as is often the case, there are ways of working around those! Sure, you can only stitch a certain area at a time. But with specially split designs, those areas can add up to an even bigger and bolder piece of embroidery.
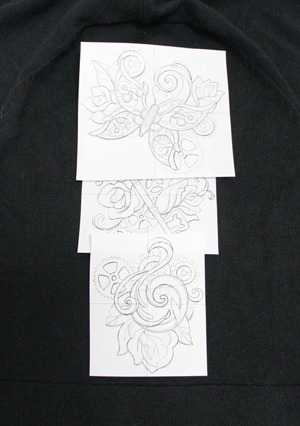
The bottom of this page shows several designs that are split into multiple parts, meant to be arranged into a larger design. Those with pieces that are meant to overlap are designed with a bit of wiggle room -- as long as you get 'em close, they should look great.
Read on to discover how to stitch out multi-part designs, perfectly lining up each piece as you go!
Designs Used
Firstly, you'll want to print paper templates of each design, to help you place your design pieces exactly where you want them. Here's how to print templates. Since what you'll be printing is the embroidery design file itself, you'll need embroidery software to do this.
Now grab those printed templates of your design. I’m going to be showing the 4"x4" example of the Steampunk Sleeve design, because it’s stitched in three pieces.
If you’re unsure of how these are supposed to line up all together, look at the example provided on the original product image for the size you're using. It shows what the completed design should look like.
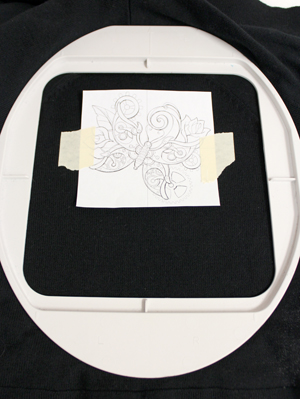
Once you know where the entire design is going, start with your first template. Tape it in place and then hoop your fabric up with an appropriate stabilizer, stuck to the back of the fabric with a bit of temporary spray adhesive.
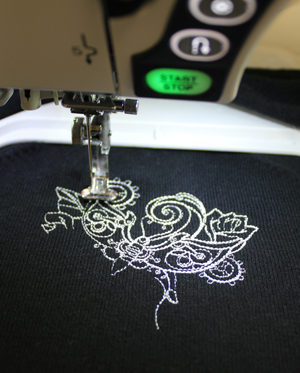
Use that template to perfectly place your design where you need it to go on your machine. When you’re ready, remove the paper template and start stitching!

Now use the next paper template to place the next section where it needs to go. The designs split into multiple parts and meant to stitch together, such as the multi-part sleeves, and peacock, are designed to be forgiving on how the pieces line up. As long as you’re close, it will look dandy and no one (including yourself) will be able to tell if it’s a little bit off.
Re-hoop your fabric and stabilizer if needed, and embroider the next section.
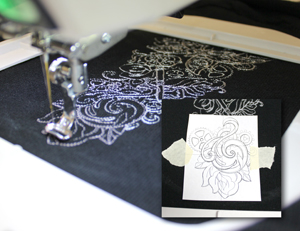
Continue in the same manner until you've stitched all parts of the design.

And we’re done! Even with a small hoop, you can create a big, bold and beautiful design.
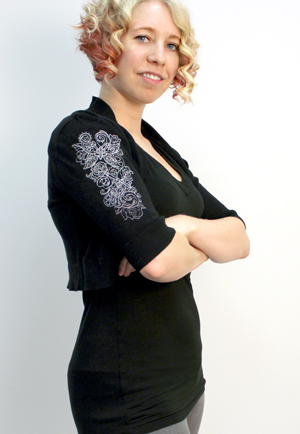
This stitched steampunk sleeve "tattoo" was created using designs no larger than 4"x4".
Size limits? Who needs 'em? Have fun transcending the limits of your embroidery machine!


