Learn how to make an in-the-hoop bookmark with a string attached accent with this helpful tutorial.
Supplies
Note: The links below are affiliate links. We may earn a small commission if you make a purchase using these links.
- Small pieces of cotton fabric
- Medium-weight cutaway stabilizer
- Tear-away stabilizer
- Embroidery thread
- Temporary spray adhesive (such as Odif 505)
- 8in of yarn, cord, ribbon, or string
- Masking tape
- Scissors
Designs Used
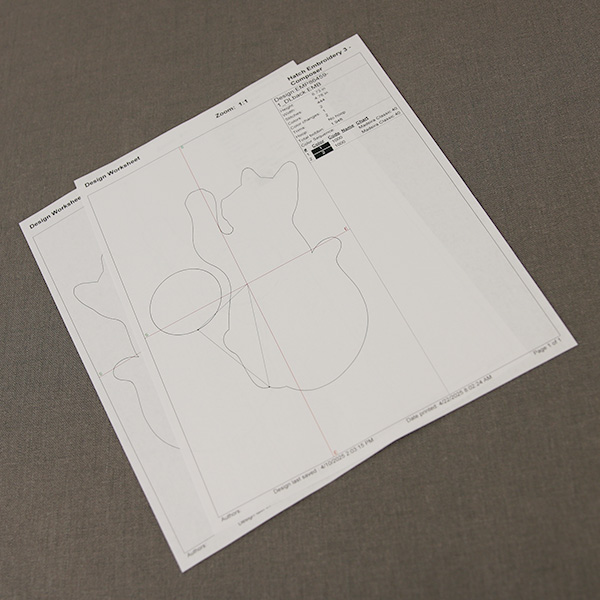
When you download the in-the-hoop design, you will find multiple files. One is an embroidery file and the others are dieline files marked with the letters "DL". Dielines are used to cut the fabric to the correct shape and size.
Open and print each dieline file using embroidery software. If you do not have embroidery software, take a look at our helpful video on using dielines without software.
We also recommend Wilcom's Hatch software which comes in different levels depending on what you'd like to use the software for. Hatch Organizer works well to view your designs, print dielines and templates, change design colors, and create basic layouts. (This is an affiliate link. We may earn commission on purchases made with this link.)
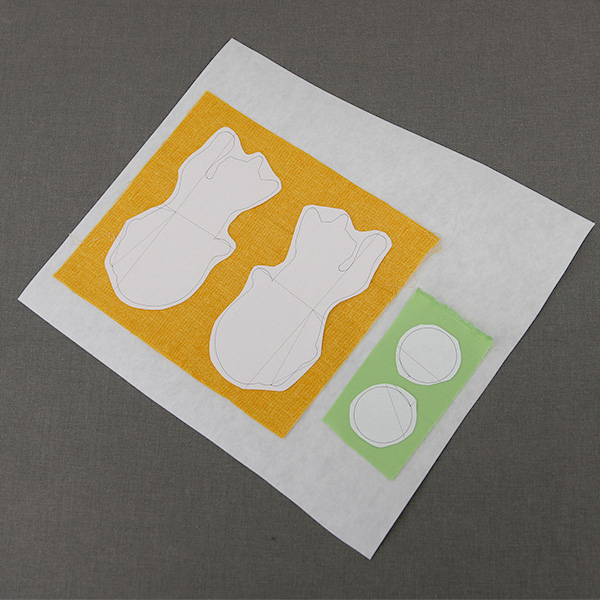
For the fabric pieces, spray the wrong side of the fabric with temporary adhesive, and smooth it onto a piece of cutaway stabilizer, so the stabilizer ends up glued to the wrong side of the fabric. Then, spray the wrong side of the front and back dielines with temporary adhesive, and smooth them onto the right side of the fabric.
Repeat this for both the front and back pieces of all fabrics.
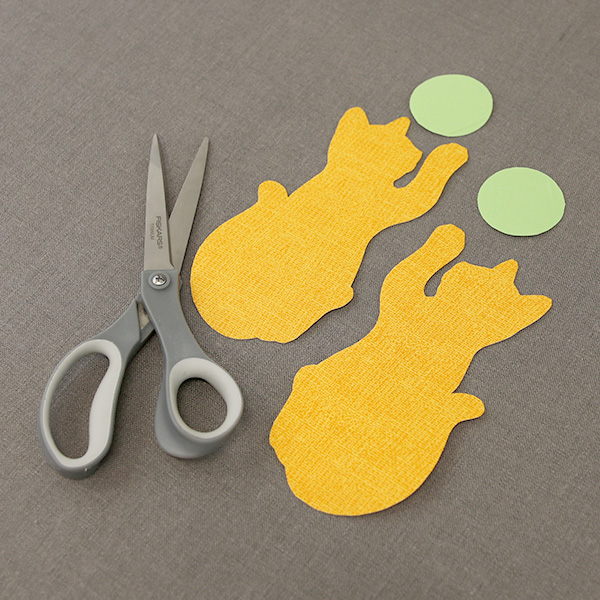
Next, cut out all the fabric shapes, and remove the paper dieline. Make sure every front and back piece is cut from fabric with cutaway stabilizer on the wrong side. In the end, there should be a total of four fabric pieces.
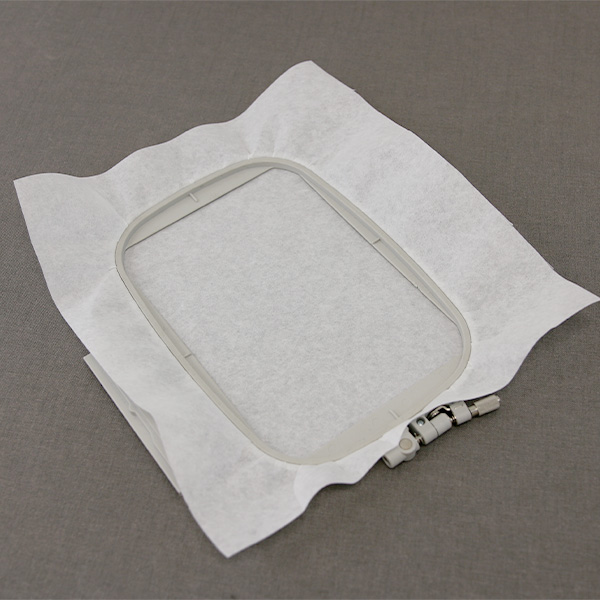
Hoop a piece of tear-away stabilizer firmly. Make sure it is hooped tightly and has no wrinkles.
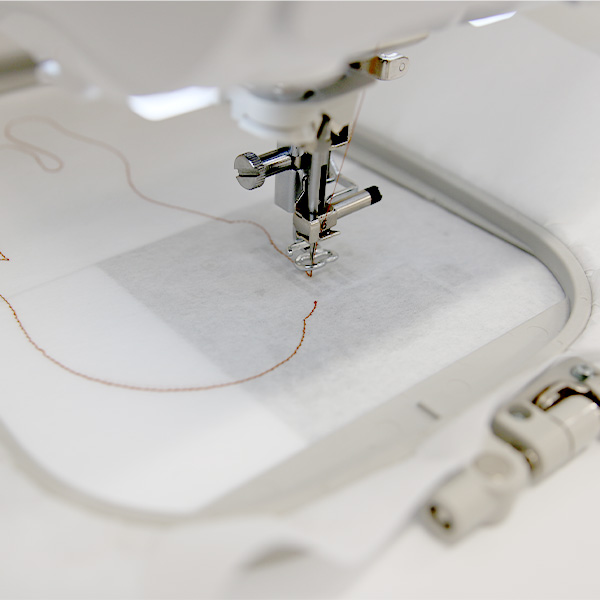
Attach the hoop onto the machine and load the embroidery file (not the dieline files). Use a 75/11 sharp sewing needle instead of an embroidery needle. The sharp sewing needle has a finer point and will make smaller perforations in the stabilizer.
Embroider the design. The first thing to embroider will be the dieline (or outline stitch) for the main shape's front fabric piece. This will mark on the stabilizer where the main fabric pieces will be placed.
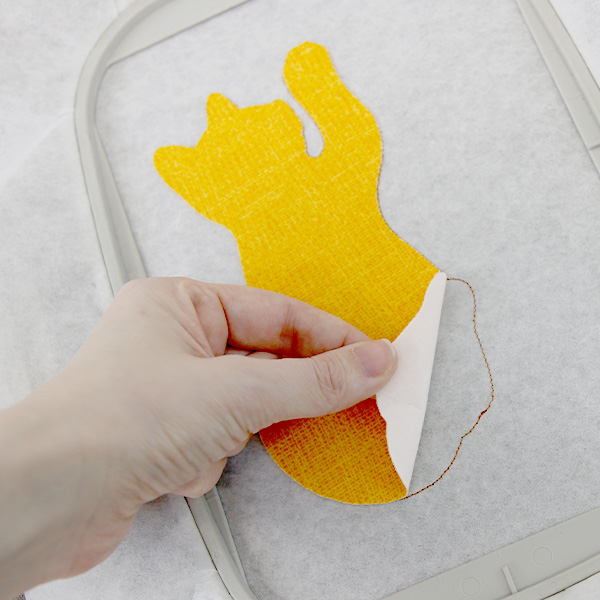
After the dieline has sewn, remove the hoop from the machine but do not unhoop the stabilizer. Spray the stabilizer side of the main shape's front fabric piece with temporary adhesive. Smooth the fabric piece onto the stabilizer inside of the sewn dieline.
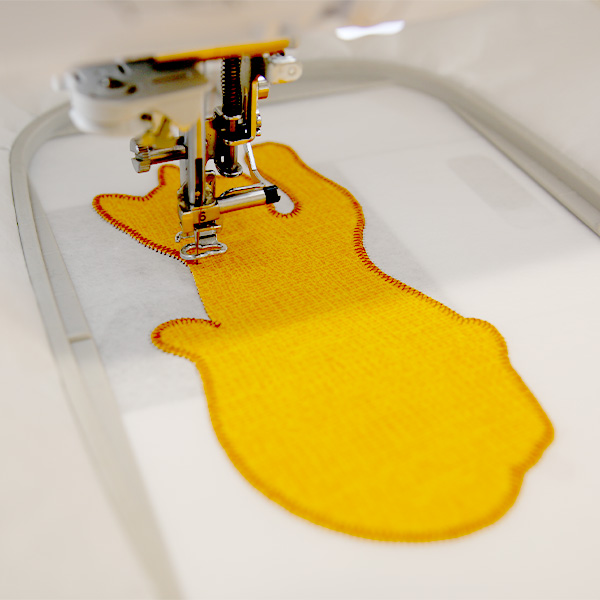
Then, place the hoop back onto the machine and embroider the tackdown for the main, front fabric piece. The tackdown will hold the fabric piece in place for the remainder of the design.
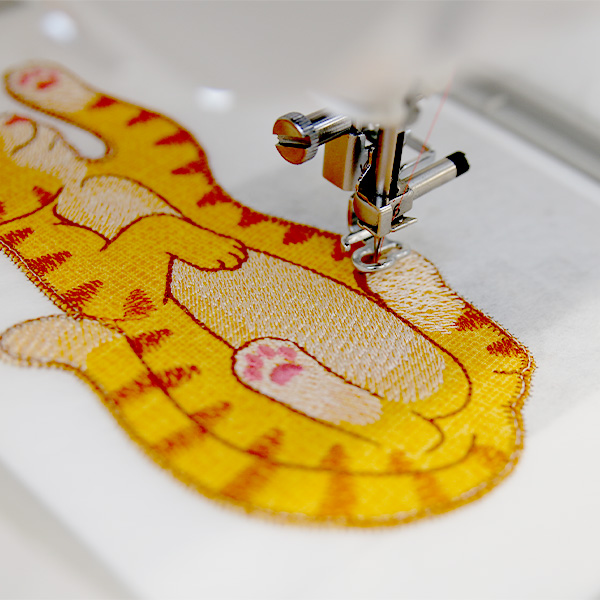
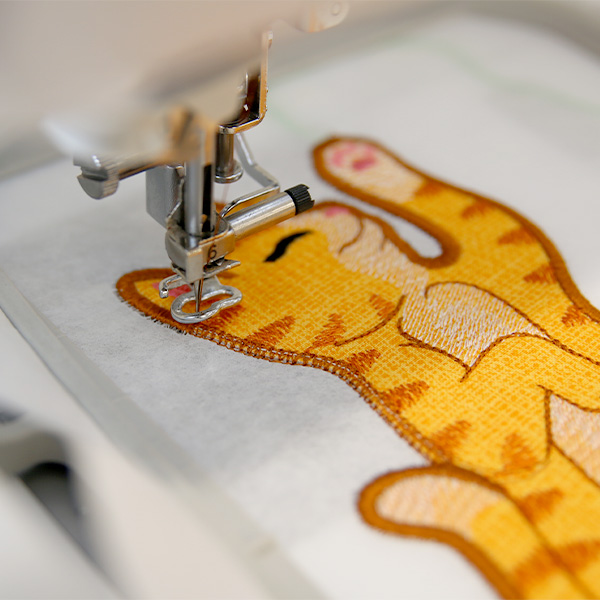
Follow the color change sheet and continue to embroider the details on the main bookmark piece. Stop before sewing the back piece tackdown for the main shape.
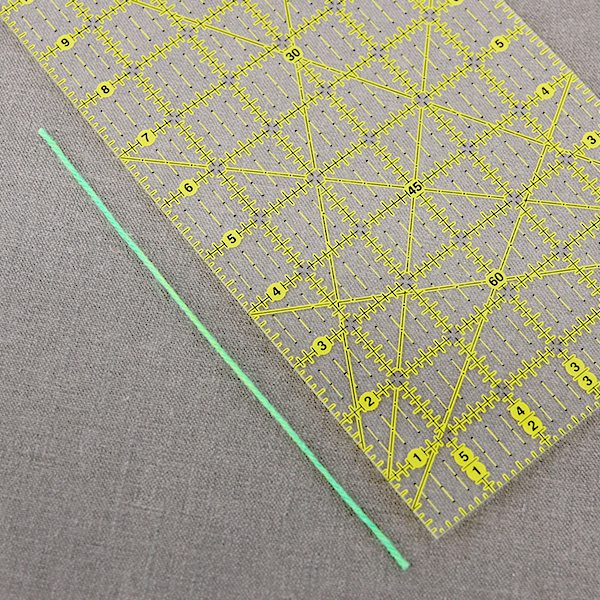
To make the connecting cord between the main bookmark shape and the small accent piece, cut an 8in length of cord, yarn, or ribbon.
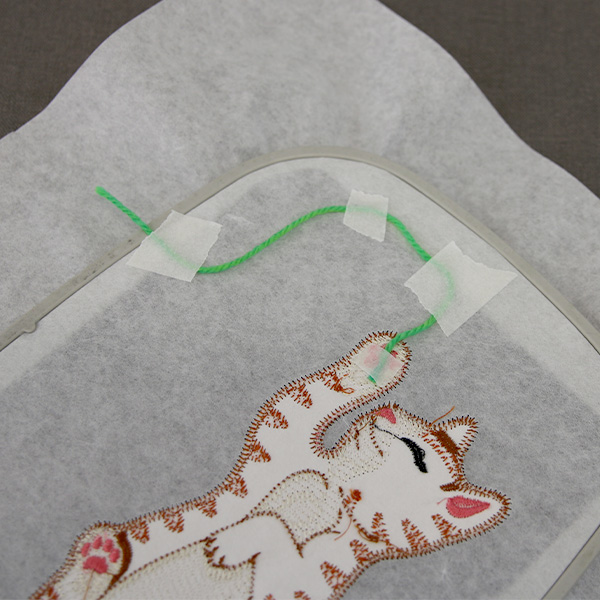
Remove the hoop from the machine but do not unhoop the stabilizer. Flip the hoop over, so the back of the hoop is facing up. Position the string, so one end is slightly overlapping the fabric and embroider area of the main piece. Then tape it into place.
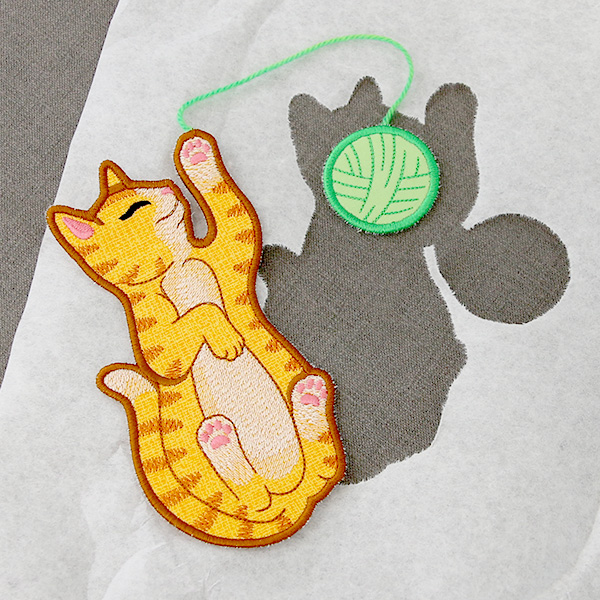
For the cat bookmark, we positioned the end of the string on the back of its raised paw, so it looks like it is playing with the string and accent piece. Position and tape the end of the string in place on the back of the embroider shape wherever it makes sense for your chosen design.
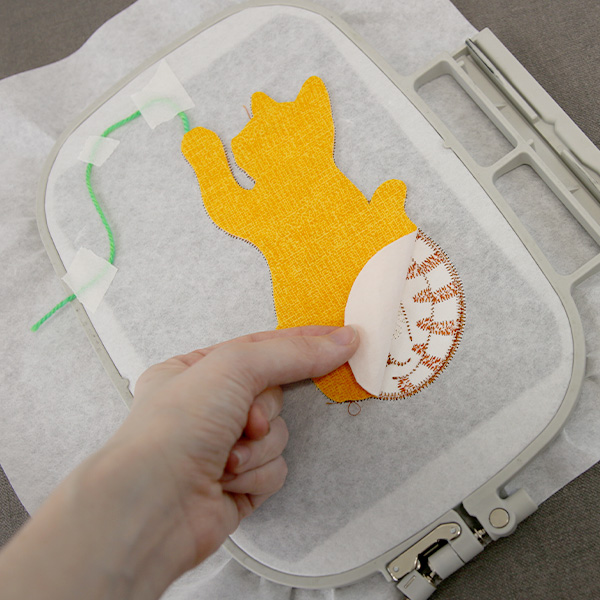
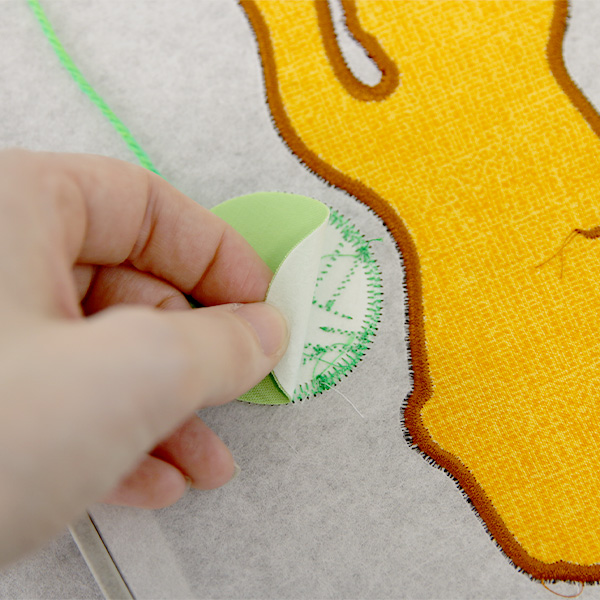
Spray the wrong side of the main, back fabric piece, and smooth it into place on the back side of the hoop inside of the embroidery shape.
For now, gently position the extra length of string towards the edge of the hoop, and tape it to the stabilizer to prevent it from being sewn over by the next embroidery steps.
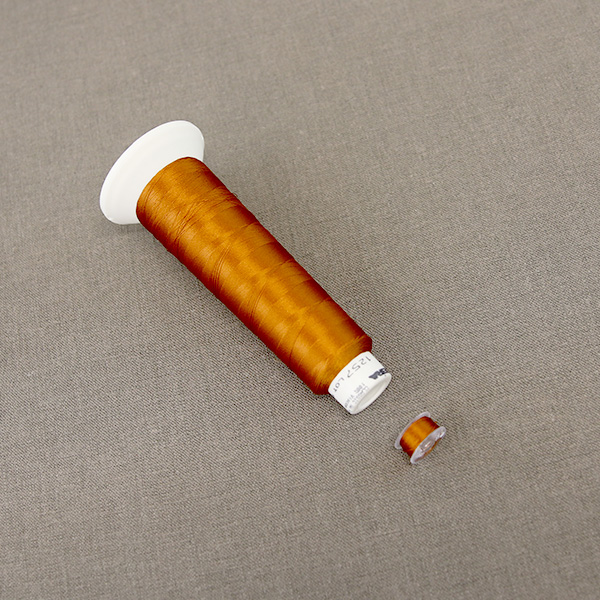
Since the embroidery of tackdown and finishing border steps will be seen on both the front and back, wind a bobbin with the same thread being used in the top needle.
Load the matching bobbin into the machine, attach the hoop, and continue to embroider the design. A tackdown will sew first to hold the back piece in place. Then a final border will sew around the main bookmark shape.
Before sewing the next dieline, the bobbin can be changed back to normal bobbin thread.

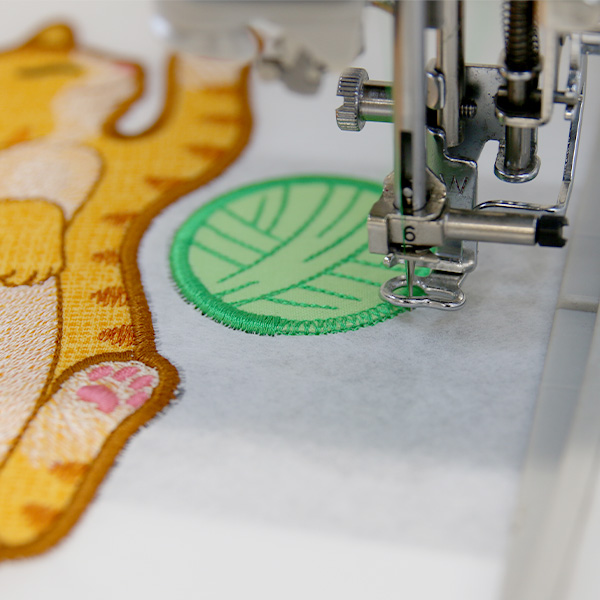
Next, embroider the dieline (or outline stitch) for the accent shape. This will mark on the stabilizer where the accent fabric pieces will be placed. Normal bobbin thread can be used for this step and the following steps until we get to the next tackdown and finishing border steps.
After the dieline has sewn, remove the hoop from the machine but do not unhoop the stabilizer. Spray the stabilizer side of the accent shape's front fabric piece with temporary adhesive. Smooth the fabric piece onto the stabilizer inside of the sewn dieline.
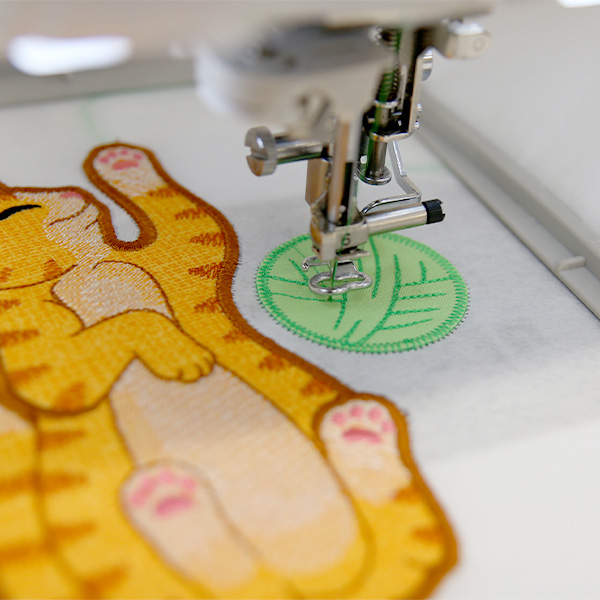
Then, place the hoop back onto the machine and embroider the tackdown for the accent, front fabric piece. The tackdown will hold the fabric piece in place for the remainder of the design.
After the tackdown is complete, embroider the inner details for the small accent piece. For the cat bookmark, a few simple lines will show to define the yarn ball. Stop before embroidering the back piece tackdown.
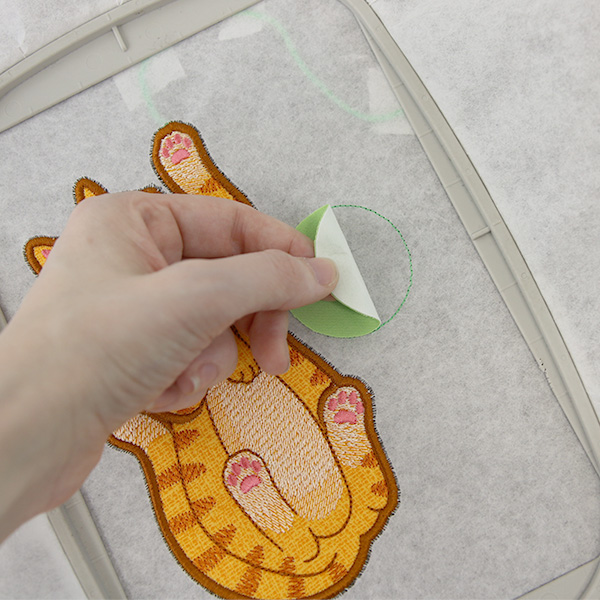
Remove the hoop from the machine but do not unhoop the stabilizer. Flip the hoop over, so the back of the hoop is facing up. Position the string, so the other end is slightly overlapping the fabric and embroider area of the accent piece. Then, tape it into place.
For the cat bookmark, we positioned the other end of the string along the top edge of the yarn ball. Position and tape the end of the string in place on the back of the embroider shape wherever it makes sense for your chosen design.
Spray the wrong side of the accent, back fabric piece, and smooth it into place on the back side of the hoop inside of the embroidery shape.
Again, gently position the extra length of string towards the edge of the hoop, and tape it to the stabilizer to prevent it from being sewn over by the next embroidery steps.
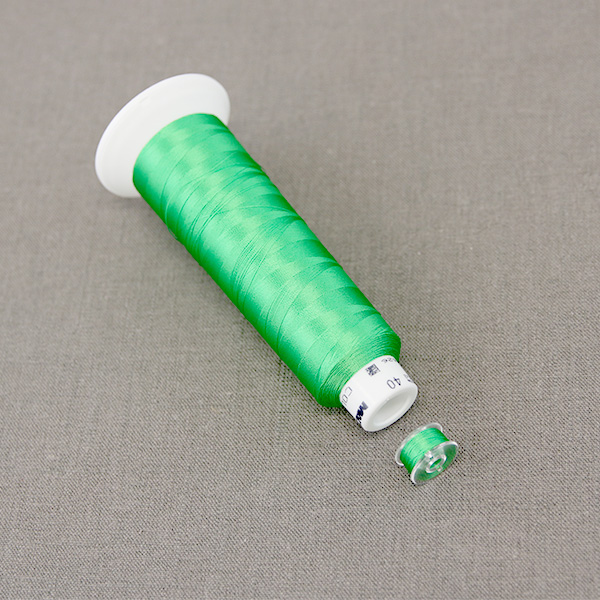
Since the embroidery of tackdown and finishing border steps will be seen on both the front and back, wind a bobbin with the same thread being used in the top needle.
Load the matching bobbin into the machine, attach the hoop, and continue to embroider the design. A tackdown will sew first to hold the back piece in place. Then, a final border will sew around the accent bookmark shape.
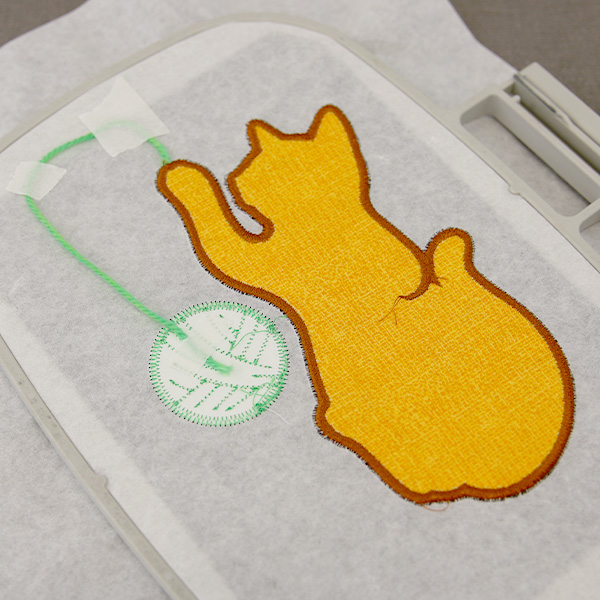
Once the design has finished embroidering, unhoop the stabilizer and gently tear it away.
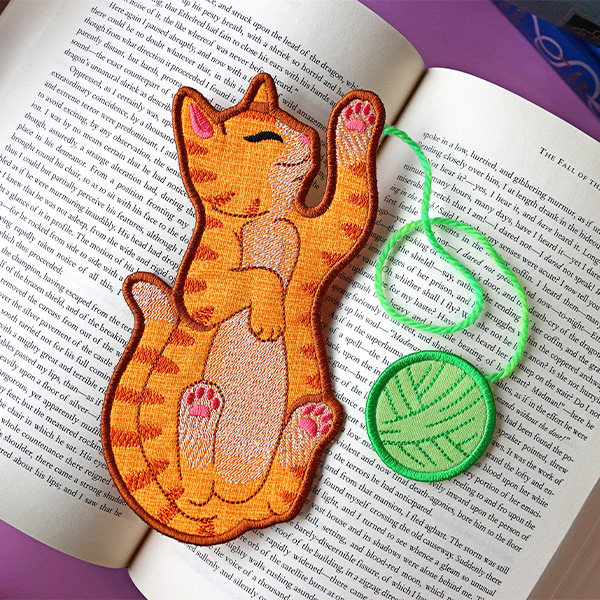
Now that the bookmark is complete, tuck the main piece into the book while hanging the string and accent out of the top for an adorable way to keep track of your place while reading. Customize the colors to create lovely gifts for the readers in your life.


