Sometimes dead simple is design at its best. Though there are all kinds of ways of making and decorating a pillow, an easy to sew, simply decorated one can sometimes make the most refined statement. This pillow is the best kind of project: easy to execute, and it looks great!
Supplies
So, to make your elegant little buttonhole throw pillow, you’ll need:
- Pillow form
- Fabric
- Chic Briar Rose Buttonhole embroidery design -- I used the largest size
- Large buttons (Make sure you grab the right size embroidery design for your chosen buttons! Check the description for each size of the design.)
- Cutaway stabilizer
- Embroidery floss and hand-sewing needle
- Scissors and pins
- X-Acto knife or small pointy scissors
Designs Used
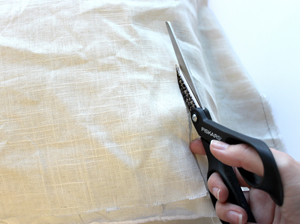
OK, so the first thing we need to do is cut our fabric to size. This will vary depending on the size of your pillow, but my simple technique is this:
Wrap your fabric around your pillow, with about 8-10 inches of overlap. Cut the excess off. Then, for your height, cut it just a tiny bit taller than your pillow itself. This may seem too small, but this will ensure your cover is snug and will make your pillow look more plump. So when you’re done cutting, you should have a long strip of fabric about the same height as your pillow.
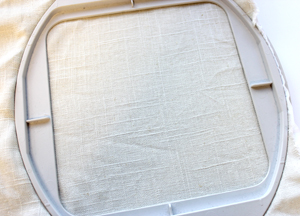
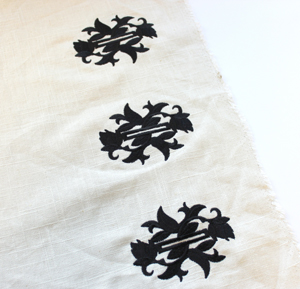
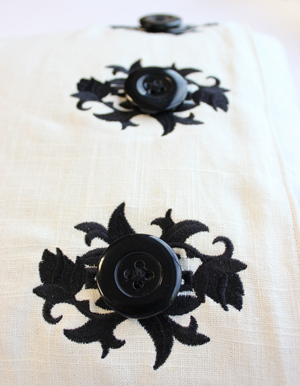
Now we need to embroider our buttonholes. How many you add will depend on the size of your pillow and your buttonhole design. For this pillow, three designs is just about right, so I’m starting with the middle one. If you have more than three buttons planned, it may be best to measure out and mark your placement with a ruler, so they come out evenly.
Hoop up your fabric with your cutaway stabilizer, as close to the right edge of your fabric as possible.
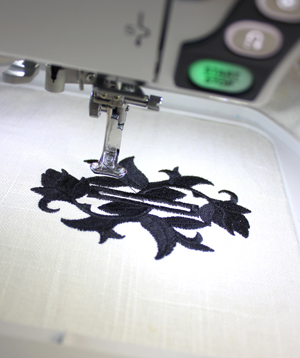
Start stitching your first design. It’s pretty simple stitching, just one color. Mine stitched pretty quickly.
Once you’re done stitching, you can unhoop and trim away the excess stabilizer. With such a light fabric like this, I trimmed mine as close as possible to the design to hide it a little better.
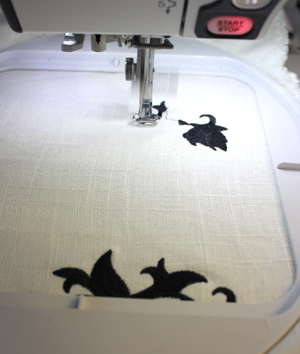
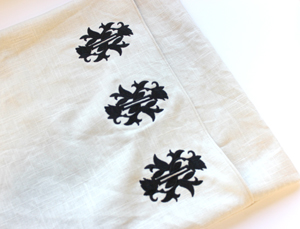
Once your first design is done, it should be easier to plan out where the top and bottom designs will go. I’d measure out equal distance and make a little mark on your fabric just to make sure. Sew the remaining two designs, or more if you have more buttons.
Done! It needs a good ironing, but our buttonholes are stitched and ready to be turned into a pillow.
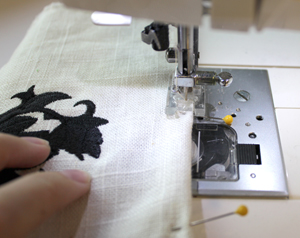
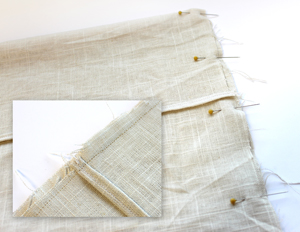
We just need to finish the two raw edges at the ends of our pillow. Fold your raw edge under twice, pin in place, and sew a seam down the side.
Do this on the other side of your pillow too. Even though that side will always be covered, it’s still nice for it to have a finished edge so it’s not getting worn when you put your pillow in and out of its cover.
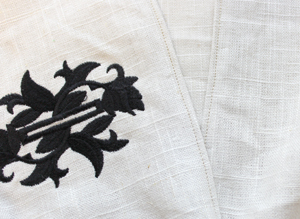
Now to measure it out! To get the best placement for your cover, it’s really easiest just to wrap it around your pillow. Fold it so the embroidered buttonholes are on top. You should have a good few inches of overlap underneath.
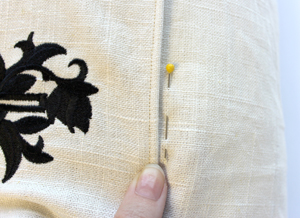
Position it where you want it (I put my buttonholes slightly off to one side) and use a pin to mark where that fold will be. I also added pins into the sides so I could see where the planned edges of my pillow will be when it’s flat.
Unwrap your pillow from its cover, and fold it back up again, but this time, inside out. Use your pin markings to find where it should fold.
In this case, you want your embroidered flap underneath, so it ends up on top when we turn this whole thing right side out. If your pillow is square, your whole folded fabric should be square. It seems obvious, but it’s a good way to make sure it’s folded tight enough. Once it’s ready, pin in place and sew a seam down both sides.
Turn it right side out again. Neato! We have a pillow.
To check that all your sizing is correct (and it will make our next steps easier) stuff that pillow form inside to make sure you have a nice snug fit. Looking good!
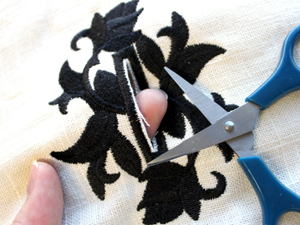
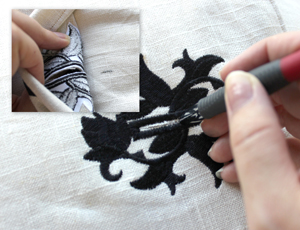
OK, let's make those embroidered designs useful. Grab your small pointy scissors or X-Acto knife and cut open the slit inside the stitched buttonhole, being very careful not to cut the stitching. The satin edges will ensure your hole never frays past that point. Cut open all your stitched buttonholes.
With your pillow still inside, grab a pencil or fabric pen, and add a marking to your fabric underneath through the buttonhole. Try to mark it right in the middle. This will be where you’ll stitch each button.
When you pull back the top embroidered flap, you should be able to clearly see your marking on the fabric underneath. Now we’re ready for our buttons!
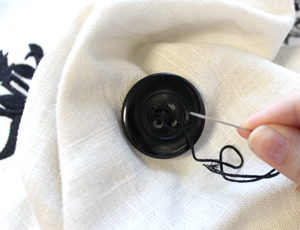
I found regular thread to just be too dainty for these big buttons, which is why I recommend embroidery floss. Stitch each button in place where you added your markings.
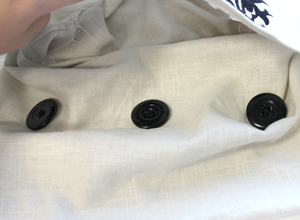
All three buttons stitched and ready to go! I’m not sure what it is, but there’s something really delightful about big, shiny buttons.
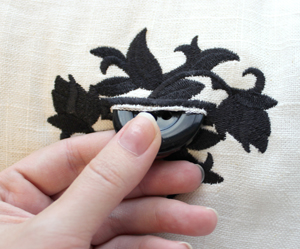
Pull each button through its new little home.
Ta da! Easy as pie. And just about as cute.
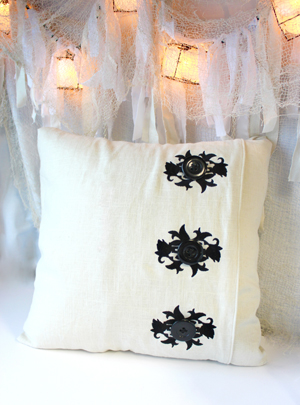
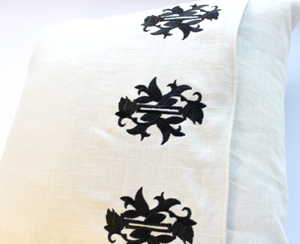
Simple in execution, but those fancy embroidered buttonholes really add something special to the otherwise elegantly minimalist design.
It’s one of the simplest ways of making a pillow cover, and with big shiny buttons and elegant embroidery, it’s a quick and chic way of dressing up your home!


