September is here and school has begun. For me as a kid, there was nothing quite like new school supplies. Not usually because they were shiny and new, but because it was my big chance to personalize them with doodles, stickers and notes to make them the ultimate representation of my new school self. Stitch up a cute, colorful pencil case to inspire those going back to class to make the new school year just how they want it to be! A faux notebook effect and light stitching doodle designs are the perfect way to dress up this simple pencil box.
Supplies
Supplies for this are pretty simple. To make your doodle pencil box, you’ll need:
- Light/white fabric (for the notebook look)
- Matching poly zipper (no metal!)
- Cutaway stabilizer
- Scissors and pins
- Temporary spray adhesive
- Awesome doodle designs. I chose the Doodle Border, but you could also combine lots of other doodle designs in the Light Stitching category.
Designs Used
Let’s start with our fabric. The minimum dimensions of the two sides we need for our box are 10 inches by 4 inches, but you’re going to want lots of excess fabric to stitch and hoop. Plus I stitched my notebook texture as all one piece, so I made my fabric about 14 inches by 14 inches. This gave me lots of room to play! We’ll cut it down later./p>
YoYou’ll want to stick your stabilizer to the back of your fabric with a bit of temporary spray adhesive now, as it will help when we stitch our notebook pattern.
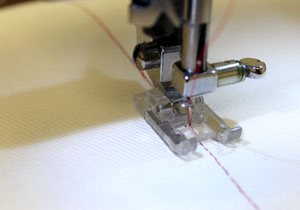
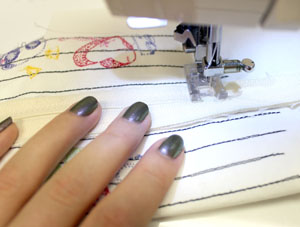
To make our faux notebook lines, we’re just going to stitch them with our regular sewing machine! I started with the long red line that runs “down” the page. Stitch down and back a few times to get it nice and bold on your fabric.
Next you want your ruler straight blue lines. Stitch one line across, careful to keep it straight as possible and perpendicular to your red line.p>
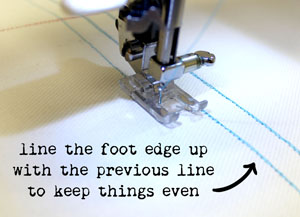
In order to keep your following lines straight, move your needle all the way to the far edge, and line up the sewing foot with the previous line. That way your lines should all stitch perfectly straight next to each other, and always be evenly spaced.
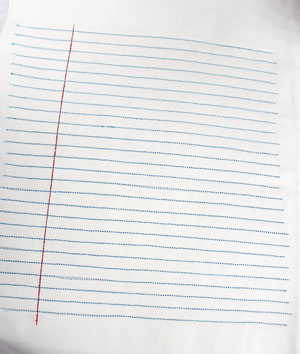
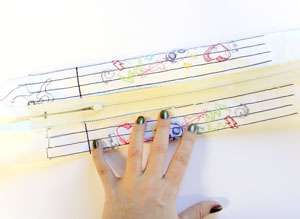
Ta da! A beautiful stitched page of “notebook” paper, just begging for some fun doodles.
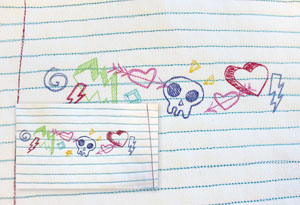
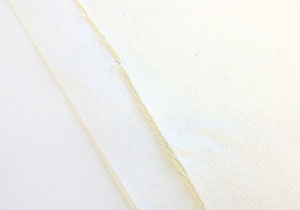
Now hoop up your notebook fabric and stitch up your doodle designs. Keep your designs somewhat close to the red line edge so you see them once it turns into a little box.
I stitched our doodle border. In order for my box lines to match up, I flipped the design upside down and stitched it again, so when the lines matched up the design would be right side up on the other side of the box.

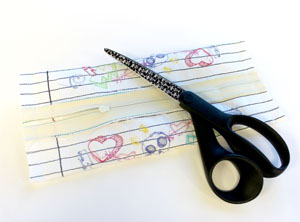
If you haven’t already, cut your pieces in half, so you have a piece for each side of your box. Cut your fabric about an inch above your doodle designs, and about 4.5 inches tall. I didn’t bother trimming the width yet, we’ll get to that when we need to.
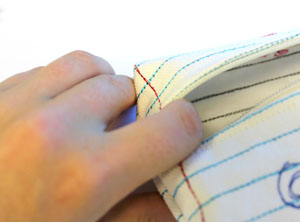
Now the zipper! Pin one side of your zipper, facing right side down, to the top of one of your box pieces. Sew a seam down that side.
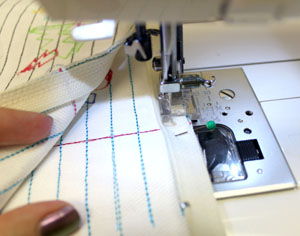
Repeat that with the other fabric piece.

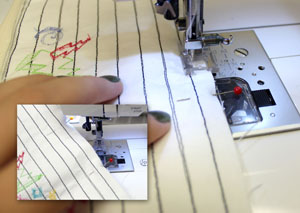
When you flatten out your zipper and fabric right side up, you’ll have the zipper up and your embroidered fabric right side out. I also like to at this point fold a little of that excess right next to the zipper and sew one extra seam, to keep it super tidy and hidden. This is the best technique I’ve found to get it perfectly lined up with the zipper like this.
Repeat that fold and seam on the other side.
Now fold those two pieces flat, right sides together so your embroidery is touching. Line up the bottom edges, and sew a seam. leave the edges open for right now.
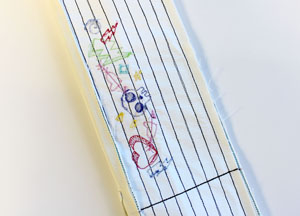
This is what it should look like right now. A flat tube, with a zipper at the top and a closed seam at the bottom. The ends are still open.
Now flatten out your tube with the zipper in the middle, like so. Unzip your zipper a little bit at this moment, because once we stitch the ends closed we need to be able to unzip it to turn it right side out!
SeSew a seam down either side of your flattened tube now. The length of your bag is up to you -- I made mine about 10 inches wide.
Trim the excess fabric off the edges of your bag. Believe it or not, we’re nearly done! Just one more little touch.
Pinch the four corners of your bag flat, about 1/2 inch up, and sew a seam at each corner. This will give it a bit of a “box” shape instead of just a flat pouch. Trim the excess off the corners.
Finally, unzip your bag and turn it right side out, then push out the corners into their nice boxy shape.
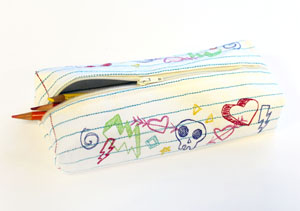
That’s it! Your adorable little doodle pencil box is done. Fill it up with colored pencils, pens, art supplies, whatever your heart desires! The fun and whimsical doodle outside will remind you to reach for a pen or pencil now and then and add a bit of character to the world.
Use the doodle border or pick your favorite doodle designs! It’s a snap to make and a great way to start off the school year.


