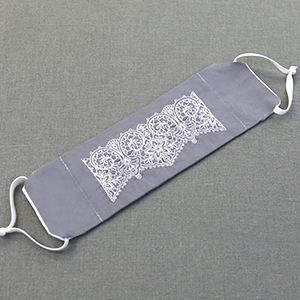
Fashion meets function with this clever face mask sewing pattern! Simply choose your fabric and your favorite embroidery design to create your own. The step-by-step project instructions below will show you how!
Supplies
To stitch your embroidered face mask, you will need:
- Embroidery design that fits your chosen mask size. We're using the Whimsical Mask Motif - Delicate Blooms.
- Printed face mask sewing pattern (available below)
- 1/4 yard of cotton (outer fabric)
- 1/4 yard of cotton (lining fabric)
- Soft cutaway stabilizer (such as Sulky Soft'n Sheer)
- Temporary spray adhesive (such as Gunold KK100)
- Scissors
- 1/4" Elastic or ribbon (for ties)
- Safety pin
- Air erase marker
- Wire or pipe cleaner
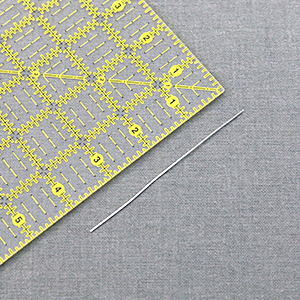
- Quilter's ruler
- Needle nose pliers
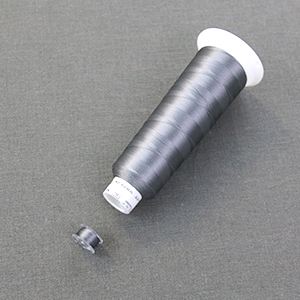
- Thread to match your fabric
- Small scissors
Designs Used
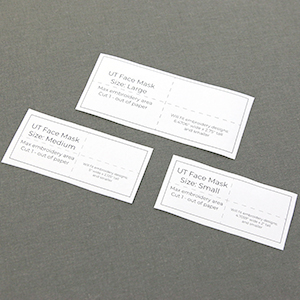
There are three different sizes of this face mask: a small size that fits children, plus adults with smaller faces, a medium size that fits most women, plus men with smaller faces, and a large size that fits most men, plus women with larger faces.
To know what size of embroidery design to use, first select a mask size and print out the pattern. You can do this by clicking on the appropriate size below. Clicking on these options will open a file with printable pattern pieces. Be sure to scale the patterns to 100% when printing.
Face mask pattern: Small size
Face mask pattern: Medium size
Face mask pattern: Large size
All three sizes of the mask have a different maximum embroidery area. When you print out your pattern piece(s), there will be a guide included that shows the largest usable embroidery dimensions for each size of mask.
The smallest face mask has a max embroidery area of 4.7 inches by 2 inches. The medium mask has a max embroidery area of 5 inches by 2.125 inches. The largest face mask has a max embroidery area of 6.4 inches by 2.75 inches.
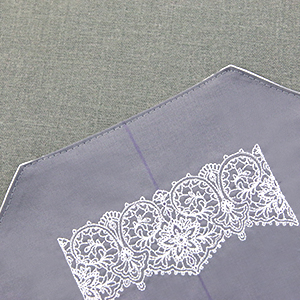
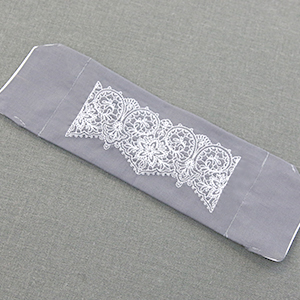
Before cutting out your pattern pieces, your fabric will need to be embroidered. Set aside your pattern pieces for now, and select your desired embroidery design(s).

To begin, cut a piece of the outer fabric and a piece of soft cutaway stabilizer. Both should be larger than the embroidery hoop and the mask pattern piece in both height and width. We cut our fabric and stabilizer to 12"x12".
Make sure to use a soft and flexible cutaway stabilizer. Using a cutaway stabilizer will help prevent wrinkles and puckering around the design. Puckering is more likely to occur if you use water-soluble stabilizer. Sulky Soft'n Sheer is great choice for a soft cutaway. It is soft and flexible and should not be noticeable when left on the inside of the mask.
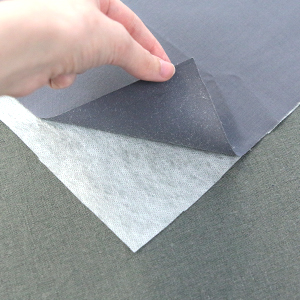
Spray the cutaway stabilizer with a temporary adhesive. Smooth the stabilizer onto the wrong side of the main fabric piece.
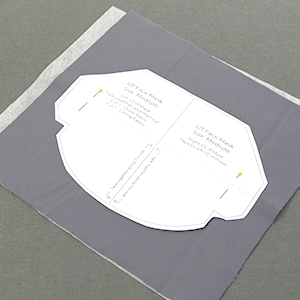
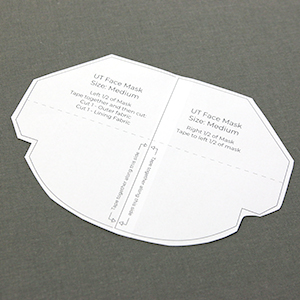
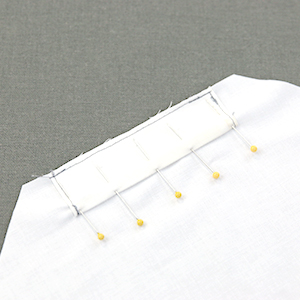
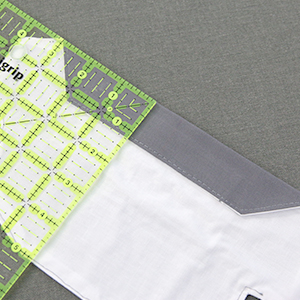
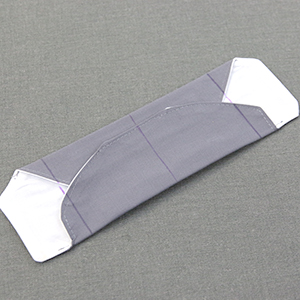
The mask pattern will print in two pieces that need to be taped together. Once taped together, center the pattern on the right side of the outer fabric piece. Do not use spray adhesive yet. If needed, you can pin the pattern piece in place.

Using an air-erase pen, mark the four vertical and horizontal axis lines along the edges of the pattern. The horizontal axis is marked by the dotted line on the pattern. The vertical axis is the center line where the two halves are taped together.
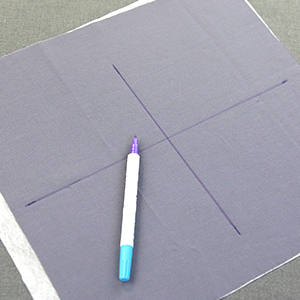
Remove the pattern from the fabric. Use a ruler to connect the axis marks, creating a cross on the fabric. This will act as a guide to help center the embroidery.
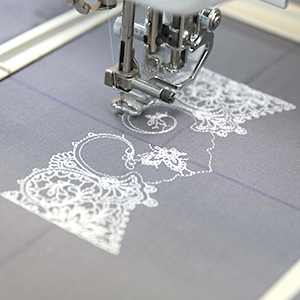
Hoop the fabric and stabilizer together so that it is drum tight with no wrinkles. Make sure to match up the drawn axis lines with the marks on the hoop.
Load the embroidery file onto your machine and secure the hoop onto the machine. Center the needle over where the two axis lines meet to ensure the design is centered.
Follow the color change sheet and embroider the design.
Once the embroidery has finished sewing, unhoop the design.
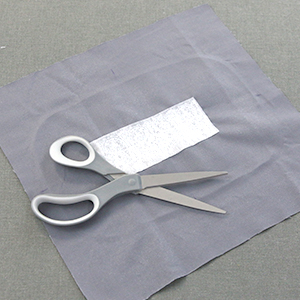
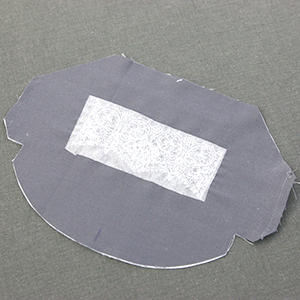
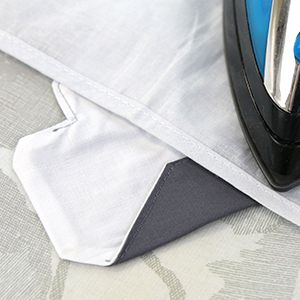
Flip the fabric over and trim away the excess cutaway stabilizer from around the design. Leave a small 1/8"-1/4" border of stabilizer around the outside edges of the embroidery for best results.
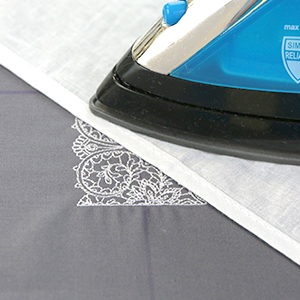
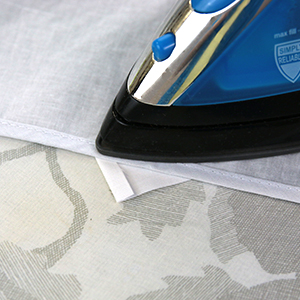
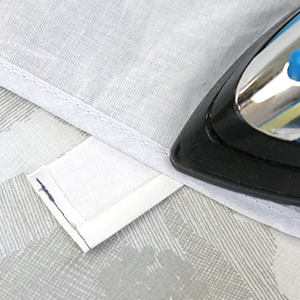
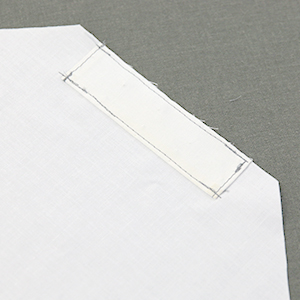
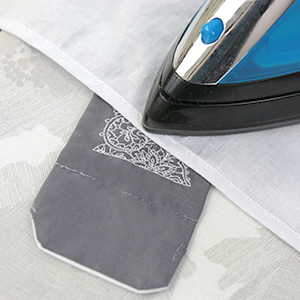
Press the fabric and embroidery with an iron to remove any wrinkles or puckering. This will make the pattern lay over the embroidery more neatly and allow the fabric to cut out more cleanly. Be careful not to remove the drawn axis lines if your marking tool disappears with steam.
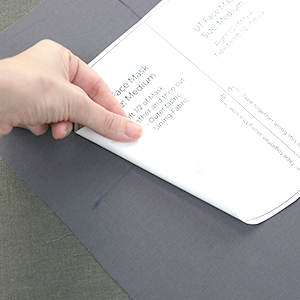
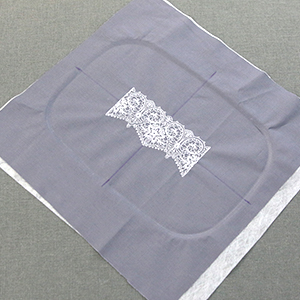
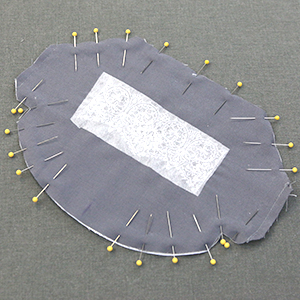
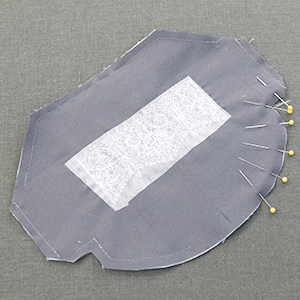
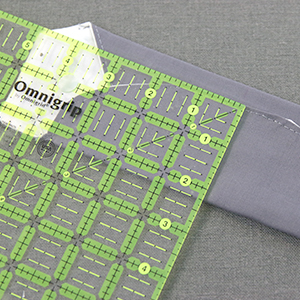
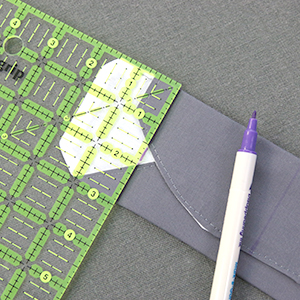
Spray the wrong side of the mask pattern piece with temporary adhesive. Use the vertical and horizontal axis lines to center the pattern over the embroidery, and smooth the pattern piece down into place.
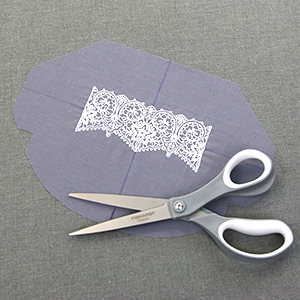
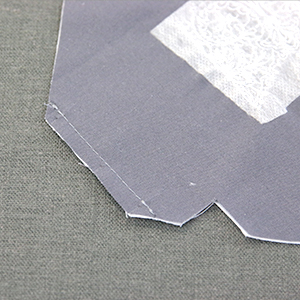
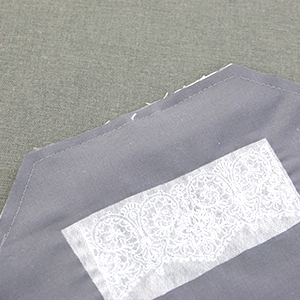
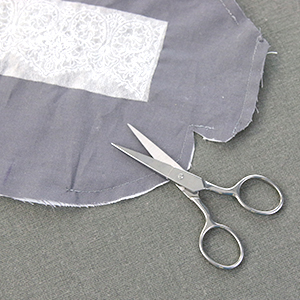
Once the pattern is in place and you are sure the embroidery is completely inside the max embroidery area, cut out the mask pattern piece following the solid black outline.
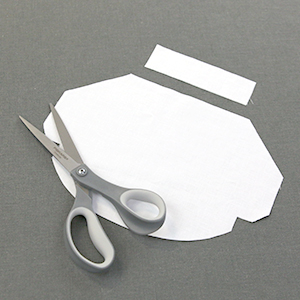
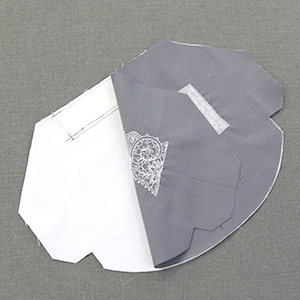
Cut the same mask pattern piece out of the lining fabric as well. At this time you will also want to cut the wire pocket pattern piece out of the lining fabric.
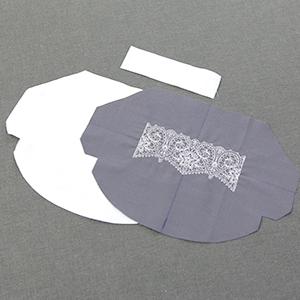
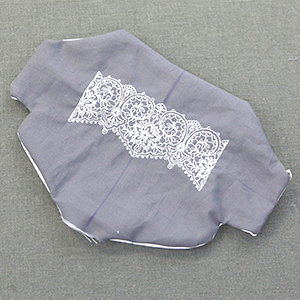
Before assembling the mask, there should be three pieces cut out in total. The wire pocket, the outer face mask piece, and the lining mask piece.
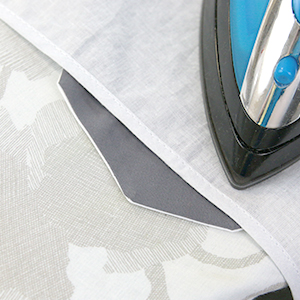
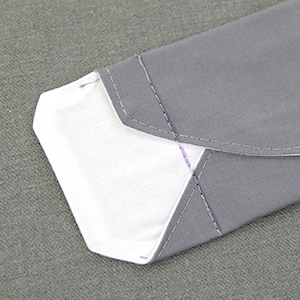
For the wire pocket, fold one of the short edges over by 1/4" with wrong sides together. Press the fold with an iron.
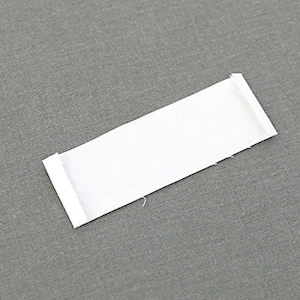
Repeat the previous step for the other side.
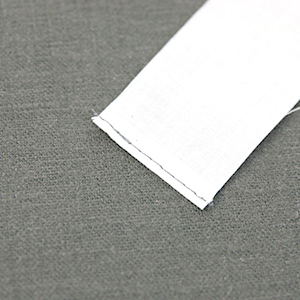
Sew one of the pressed short sides 1/8" away from the edge to secure the fold in place.
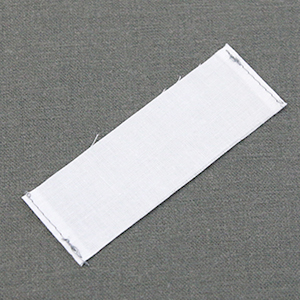
Repeat on the other side.
Next, fold one long edge of the wire pocket piece over 1/4" with wrong sides together. Press this fold as well. Leave this edge pressed only and do not sew it closed.
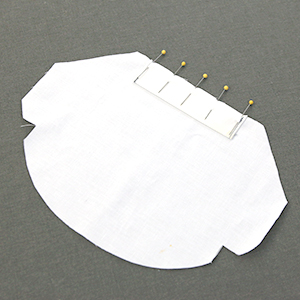
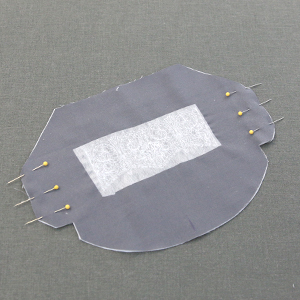
Next, take the wire pocket piece and match up the unfolded, long edge with the top edge of the lining piece. The wire pocket piece should be center along the flat top edge of the lining. Pin these piece together along the top edge. Make sure the wrong side of the wire pocket is against the right side of the lining space.
Baste the pieces together along the top edge of the wire pocket with a 1/8" seam allowance.
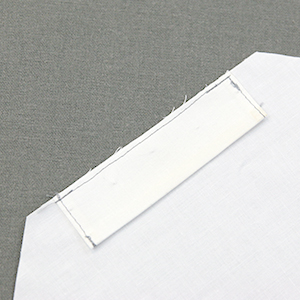
Pin the wire pocket piece flat to the lining piece along the folded bottom edge.
Top stitch the folded edge of the wire pocket down 1/8" away from the folded edge only. Leave the two short sides open.
After the wire pocket is sewn onto the right side of the lining piece, match the lining and the outer fabric pieces up with right sides together.
With all edges matched up, pin the two pieces together only along the left and right flat sides.
Sew along one of the pinned flat sides with a 1/4" seam allowance and remove the pins.
Repeat to sew along the other pinned flat side with a 1/4" seam allowance.
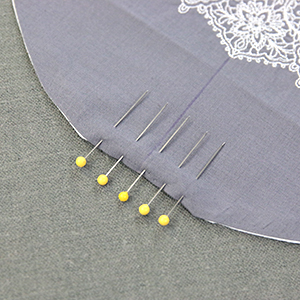
In this step, you will pin the pieces together along the top and bottom edges of the mask.
For the top edge of the mask, measure 3/4" in from both sewn sides, and place one pin where you measured on each side, then pin between those pins.
For the bottom edge of the mask, also measure the 3/4" in from both sides, mark it with a pin, and pin between those pins, leaving a 3" opening for turning your mask in a later step.
Note: It is important that you leave a 3/4" space on both the top and bottom sides of the mask to create openings for elastic channels once the mask is sewn.
Along the top edge of your mask, sew a 1/4" seam following the line of pins. Again, you will need to leave a 3/4" opening on both ends of this seam.
Along the bottom edge, also sew a 1/4" seam where it is pinned only. Make sure to leave the 3/4" openings on both sides. Also leave the 3" opening at the bottom center, unsewn.

Repeat the previous step to sew the other half of the bottom edge. Again, make sure to leave the 3/4" openings on both sides and the 3" opening at the bottom center.
Carefully clip a notch into the two bottom corners on both sides of the face mask. Cutting these notches will help these corners turn out and remove bulk when the mask is flipped right side out.
Turn the mask right side out through the 3" opening at the bottom center of the mask.
Fold the edges of the openings in by 1/4" and press. Then press the sewn edges until they're crisp.
As the topstitching will be seen from both sides, match the bobbin to the thread that is being used on the top thread.
Before topstitching along the top edge, again measure in 3/4" from both sides and mark it with a pin or marking tool. Then topstitch along the top edge with a 1/8" seam allowance. Make sure to leave the opening on both sides.
Pin the bottom edge where the opening edges are folded. This will help to sew the fold more cleanly when topstitching.
Before topstitching along the bottom edge, again measure in 3/4" from both sides and mark it with a pin or marking tool. Then topstitch along the bottom edge with a 1/8" seam allowance. Make sure to leave the opening on both sides.
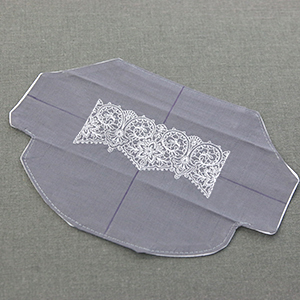
To create the top pleats, fold the top edge (with the wire pocket) down 1 - 1/4". Make sure to fold it in toward the lining.
After folding the edge, press it until it is nice and crisp.
Then, fold the bottom edge up as well. For the large and medium size masks, fold it up 2 - 1/4". For the small size, fold it up by 2". There should now be a flat line across the bottom edge.

Press this edge after folding until it is nice and crisp as well.
After both the top and bottom edges have been pressed, measure 1 - 3/4" in from one side edge, and draw a line from the top to the bottom using a temporary marking tool.
Repeat to measure in 1 - 3/4" from the opposite side, and draw a line from top to bottom.
On either side of the mask, sew directly on top of the drawn line.
Repeat to sew directly on top of the other drawn line. These two sewn lines will hold the center pleat in place and keep the embroidery centered. When wearing the mask, fold these two edges out so they cover your nose and chin.
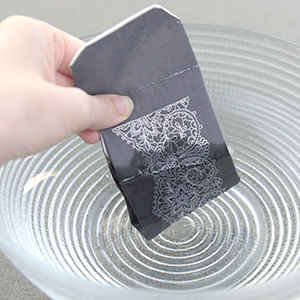
Now that all sewing is finished for the mask, wash your mask. Both hand washing with dish soap or running it through a washing machine with cool water is fine. This will remove the temporary spray adhesive and make the mask clean and safe to wear.
After the mask has been washed, press it once again with an iron and pressing cloth. This will remove any wrinkles that may have formed during the wash.
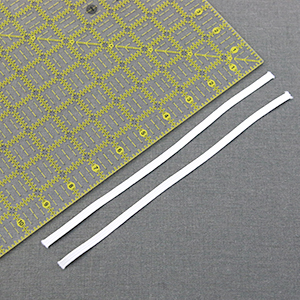
To make elastic loops, cut two pieces of 1/4" elastic to be 10" long.
To make ties, cut a piece of ribbon to be 40" long.
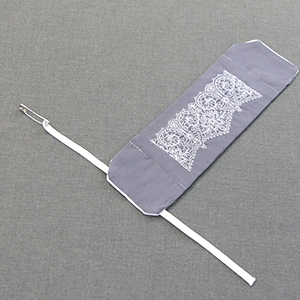
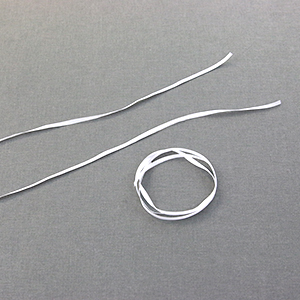
For both the elastic and ties, pin a safety pin to one end, and use it to pull the first elastic piece or tie through either channel.
For the elastic, tie the two elastic ends together to form a loop and trim the excess elastic away after pulling the knot tight. If using ties, do not do this step.
For both the elastic and ties, repeat to thread the elastic or tie through the channel on the other side using the safety pin. If using elastic, tie it into a loop and trim away the excess. If using ties, move onto the next step.
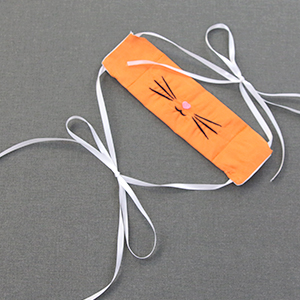
For the ties, the top two ends of the ribbon will be looped over your ears and tie behind your head. The bottom two ends will be tied down behind the nape of your neck. It is usually easiest to tie the top ends together before the bottom ends when putting it on.
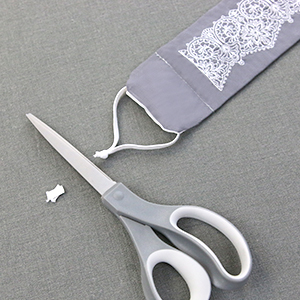
To create the wire for the wire pocket, cut a piece of wire that is 3.5"-4" long. Thin jewelry wire works best, but pipe cleaners can also be used.
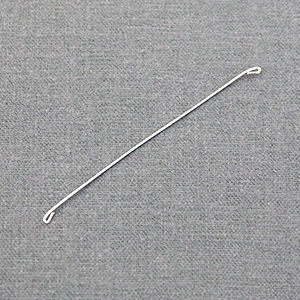
Curl or fold both ends in so they will not poke through the fabric. A needle nose pliers or wire curling pliers works well for this.
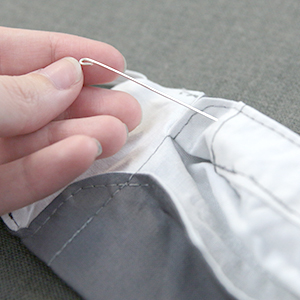
Slide the wire into the wire pocket. This can then be bent to help the mask fit the wearer's face comfortably and with a better seal around the nose. It can also help keep glasses from fogging up.
Before washing, make sure to remove the wire from the mask so it does not rust.
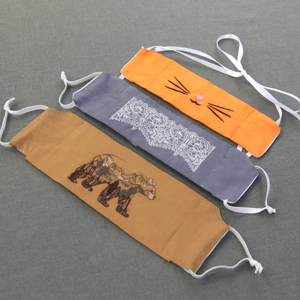
Your mask is now ready to wear! Repeat these steps to make more masks in different sizes, fabrics, and using different embroidery designs.
For best results, hand wash your mask with dish soap after wearing it and allow it to air dry.
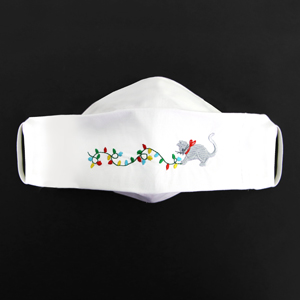
P.S. Face masks can be a functional gift for the holidays, too! We used the adorable Christmas Lights Kitty for a festive and fun touch.


