Supplies
To you make your embroidered gift tag you'll need:
- Printed or stitched gift tag templates
- Cutaway stabilizer
- Tear-away stabilizer
- Spray adhesive
- Scissors
- Ribbon
- Fabric for the label
- Matching wound bobbin
Designs Used
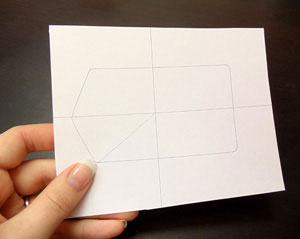
So to begin, you're going to need some templates for the tag shapes. If you have embroidery software, you can print the two dielines. If you can't print them, you can load up the dieline in your embroidery machine, hoop up your tag fabric, and stitch the outline.
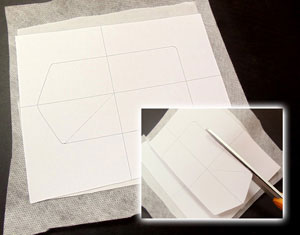
Either way you get it, you're going to want to cut a piece of cutaway stabilizer a little larger than your tag template, give it a light coating of spray adhesive and smooth it onto the back of your tag. So if you printed it, you'll have a piece of stabilizer, a fabric piece on top, and finally the template on top of that. Carefully cut out your tag shape.
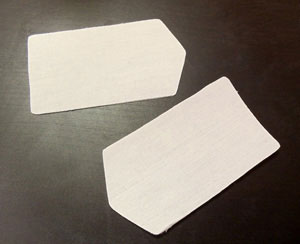
Repeat this process until you have two tags, one piece for the back, one for the front. Make sure each piece is backed with cutaway stabilizer.
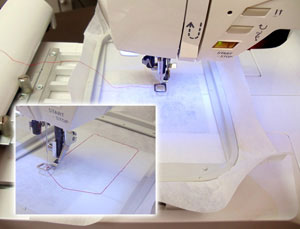
Start by hoop up a piece of tear-away stabilizer. If you haven't already, now is also a good time to wind up a bobbin that matches the color you're going to use for your satin stitch outline. Once you set your machine to stitching, the first thing it's going to do is stitch a dieline.
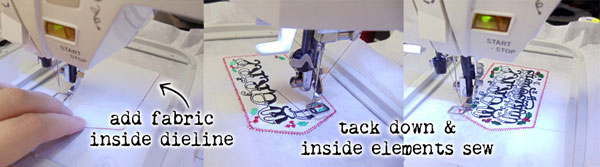
Lightly spray the back of your tag piece, and carefully place it inside the dieline. Once you set your machine to sewing again, it will stitch a tack down, holding your fabric in place. After that, all the inside elements will stitch out.
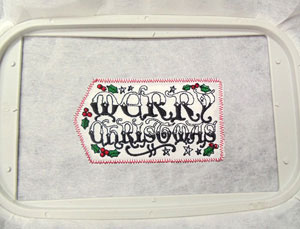
Once the inside elements have finished stitching, it's time to take your design off the machine, but don't un-hoop it! This is what your tag should look like at this point. We're going to add some ribbon and additonal pieces to the back to finish it.
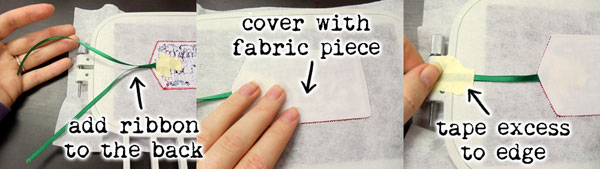
Still in the hoop, flip your design over. Cut a length of ribbon, and carefully tape it to the back, right at the pointed edge. You can either tape it with the two open ends out, so it's easy to tie around things, or tape the open ends in, so it makes a useful little loop. Once your ribbon is taped down, lightly spray the back of your last piece, and place it inside the dieline, covering the edge of the ribbon. As one last step, I would recommend taping the edge of the ribbon to your hoop, so it doesn't get caught up while your design is sewing.
Before you put your design back on the machine, make sure you change the bobbin color to match the tackdown and any finishing stitches. This is important -- otherwise your tag won't match on both sides.
Once the design starts stitching again, it will stitch a tackdown to secure the back piece. For some designs this will be followed by a finishing stitch, such as a satin stitch or e-stitch border. Check the specific design's color change sheet for details. This tackdown/outline will also secure your ribbon to your tag.
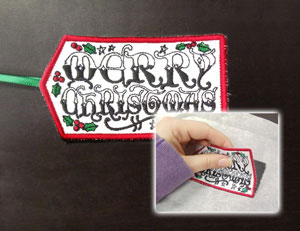
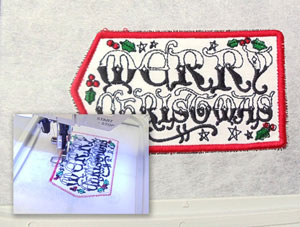
Remove your tag from the hoop, and carefully tear it free from the stabilizer. Your tag is complete! It's as easy as that.
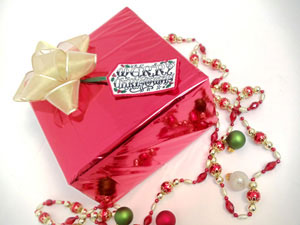
Tie it onto your your gifts and let your craftiness shine! You can write your "to" and "from" on the back if you like, or just use it to dress up your shiny gifts. 2 Available Sizes: 2 Available Sizes:
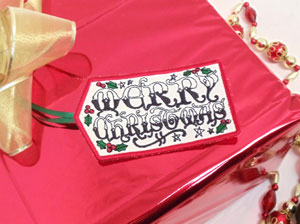
An embroidered gift tag is a great way to add a little personal flair to any item. They're easy enough to make and you can dress up all your holiday gifts! Even if you haven't found the time to make all your gifts, it's easy to find some time to add some handmake touches.


