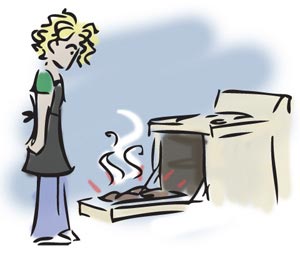
It’s funny the things that disappear when you move. We moved into our first house a little while ago, and in between packing, moving, and unpacking, a number of items were taken as hostages by the packing gnomes. One particular item I was lacking came to light quite annoyingly after I had a burning hot plate of cookies waiting to come out of the oven, and absolutely no way of picking them up. I was of course in a hurry for guests, and spend an inordinate amount of time trying to find the darn pot holder instead of just grabbing a towel or something. Needless to say, the packing gnomes have not yet felt that I need my pot holder back, so it’s time to make a new one.
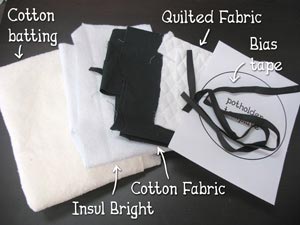
My old potholder was pretty boring anyway, so I’m going to make a much cooler one. Potholders are easy to make, as long as you have the right materials. What we’ll need for ours is some cotton batting, cotton fabric, quilted fabric, bias tape, and some nifty stuff called Insul-Brite. Insul-Brite is what we’re using as our heat barrier for the pot holder. You can find it at a number of craft stores. It should be noted that this stuff is heat resistant, NOT heat proof, so please don’t stand there holding a 400 degree casserole for 5 minutes and wonder why your hands hurt. If you want, you might also want our potholder template, which is really just a large, albeit useful, circle.
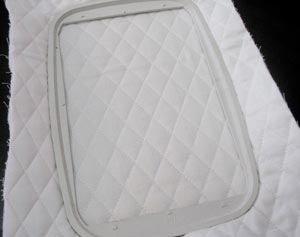
We’ll begin, as usual, by embroidering a swank design for our potholder. Now, it may not be true all the time, but that didn’t stop me from declaring that I’m "Bitchin’ in the Kitchen" with our cute design. Somehow “decidedly mediocre in the kitchen” didn’t sound as cool.
Hoop up your quilted fabric with some regular cutaway stabilizer, and stitch out your design.

See? I must be an awesome cook, my potholder says so...
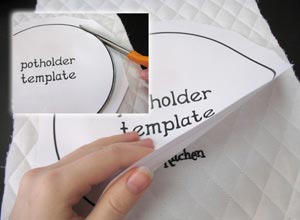
Center your
<a href="http://www.urbanthreads.com/productImages/page_pdf/PRM1055_pattern.pdf">template over your stitched design, and cut out around it to make a nice neat circle.
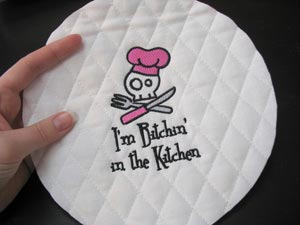
Making a potholder is really nothing more than layering a bunch of fabrics and binding it together. Once you have your top piece cut out, keep your circle template so you can cut out the rest.
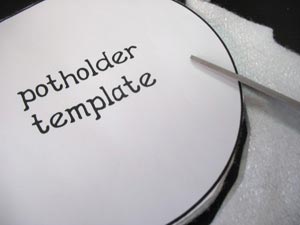
Use your template to cut out a matching circle of Insul-Brite...
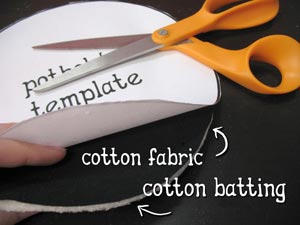
...and our cotton fabric and batting. To save time, I used some spray fixative to adhere the cotton to the batting, and cut them out together.
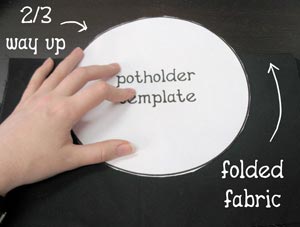
I thought it would be nice to have a little pocket on the back of the potholder so I can slip my hand inside if I wanted to. To make the pocket, fold some of your cotton fabric in half, and line it up about 2/3 of the way up the template. Cut out around the template.
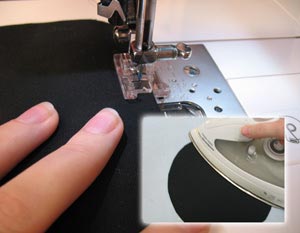
To get a nice top edge for the pocket, I pressed it with an iron and then sewed a seam across the top.
Now we need to assemble our potholder. As you assemble each layer, spray a light coating of spray fixative so that each layer stays together snugly. In the end you should have a nice glued together sandwich of layers.

Start with the pocket you just finished. Spray just the bottom edges of the wrong side of it lightly with fixative, and lay it right side down, since that’s the side that will be facing out when we’re done. Next, take your little cotton fabric/batting sandwich, and lay it batting side up. Next, grab your layer of Insul-Brite and place it shiny side up. It’s important to distinguish the different sides of the Insul-Brite, as the shiny side is the heat resistant side. Finally, grab your embroidered quilted fabric and lay it on top, with the design facing up. When you’re done, all the layers should line up at the edges and be secured together with light coatings of spray fixative.
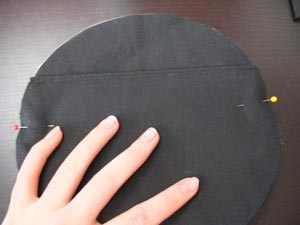
In case your light coating of fixative isn’t enough to keep your pocket in place, you might want to pin through the layers so your pocket doesn’t shift around when you’re stitching it together.
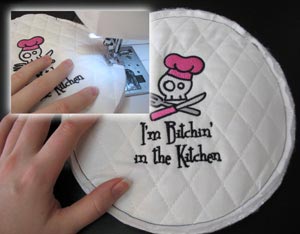
With all your layers stuck together snugly, sew a seam all the way around your circle. I would set your needle about 1/4 inch away from the edge. You don’t want the seam so far out that your bias tape doesn’t cover it.
Ta da. You now have an ugly-edged potholder. We can fix that with bias tape...
Bias tape is both the friend and foe of crafters the world over. If you can pull it off, it makes a nice pretty finished edge, but sometimes getting it on there is a nightmare. Using bias tape is especially difficult around curved edges, which is of course what we’re using it for, because I apparently have vaguely masochistic tendencies.
Worry not crafters! I have a way of using bias tape around curves that works pretty well for me. It may not be how others do it, but hey, if it works...
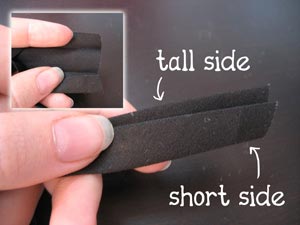
So, you’ll notice on most bias tape there’s a taller and shorter side. Fold open your bias tape so the shorter side is on top.
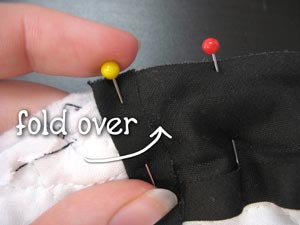
Once you’ve opened up your bias tape with the short side on top, line it up along the edge of your potholder, pinning it in place. For the starting edge, fold it over a bit, so when we wrap it around the side, you have a clean edge. Keep pinning the edge all the way around your potholder.
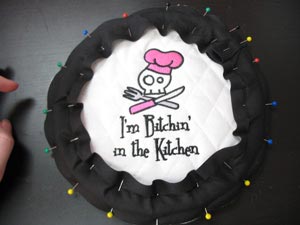
The key to bias tape, it seems, is lots and lots of pins. Carefully pin it all along the curve of the circle, remembering to fold it over again when the edges meet. Bias tape is stretchy and forgiving enough that you should be able to curve it around a shape like this and it won’t bunch. As long as the edge along the top (near the head of the pins) doesn’t have creases in it, you should be fine. Don’t worry if it’s folding a bit in the middle.
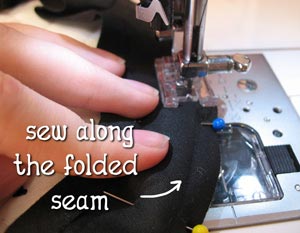
Now we’re going to sew our first seam around the edge. Stick it under the sewing machine, and line your needle up so it’s going to follow that indented seam left behind by the fold. Stitch carefully along that line, removing the pins as you go, until you’re all the way around.

This is what your bias tape will look like now, before it’s folded over the edge. You should be able to take the excess now and fold it over the edge of your potholder snugly. If all has gone well, there should be no bunching around the curve.

The bias tape should fold over the back neatly, but a few pins will be needed just to keep it from moving around, so pin around the circle every 2 or so inches. Make sure to especially pin the fold where the bias tape ends, so you can get a clean edge.
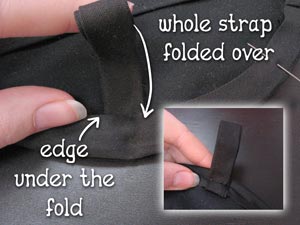
If you want a little strap to hang your potholder, cut a small length of bias tape you can use as a loop. Tuck the raw edge under the bias tape edge on the back of your potholder, then fold it over on itself so the loop comes over the top of the edge. Pin in it in place for sewing. You can see in the inset picture of what it’ll look like when it’s done stitching.
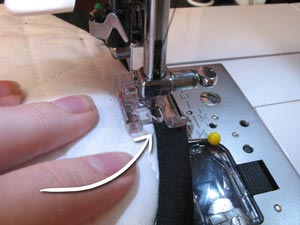
Now, to finish our bias tape, we’re going to sew the finishing seam from the front, and I’ll tell you why...
Because we’re going to be stitching just along the inside edge of the shorter front, the longer back edge should easily have enough room to be caught by the seam. To get a nice clean seam, line the middle of your foot up with the edge of the bias tape, and move your needle just to the right of it, so you’re sewing a very narrow seam just outside the edge of it. Go all the way around your potholder.
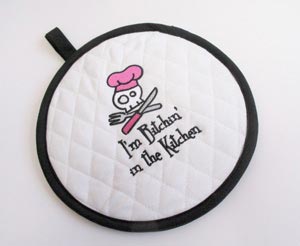
And we’re done! As befitting the spirit of the kitchen, we have a “made from scratch” super swank potholder with a heck of a lot more attitude than anything you’re going to find in a store.

A pocket on the back makes for easy grabbing of hot items, but the big round nature of the potholder also makes it a great hot pad for setting out steamy dishes.
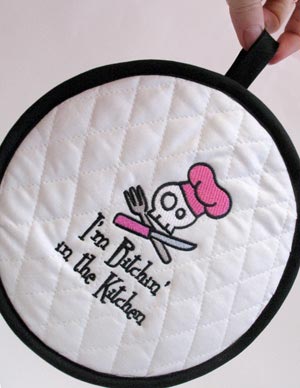
A handy hook means your potholder will never be out of reach again, so you won’t find yourself standing in front of a roasting hot pan wondering how on earth you’re going to pick it up. Plus, no one can doubt your crafty cooking skills when you’ve not only made your own potholder from scratch, but it also proclaims right on it how spiff of a cook you are.


