As part of our new apothecary series, we have a couple of super cute in-the-hoop projects for you, including a scented sachet, a little drawstring bag, and of course this super cute apothecary tag to dress up your handmade goodies.
While you could just stitch it out on white, cut a hole and call it a day, this little tag has so much more promise than that.
To truly get that wonderfully worn vintage feel, all it needs is a little love and a cup of tea!
Today I’m going to show you how to tea-stain and dress up your tag to bring it to its true vintage glory. It’s so simple to do and trust me, the results are so fabulous you’ll be dunking everything in tea.
Supplies
First of all, in order to make your tag, just get this design and follow these instructions. The only difference is there’s no satin border, and if I were you I would skip adding the ribbon. We have a much cooler solution today. In addition to your tag, you’ll need:
- Tea bags (I’d recommend a couple)
- Antique colored 3/8" grommets and grommet tools
- Hammer
- A container that can hold boiling water
- Ribbon or a strip of fabric (I’m using a piece of raw silk)
- Scissors (not pictured 'cause they’re shy...)
Designs Used
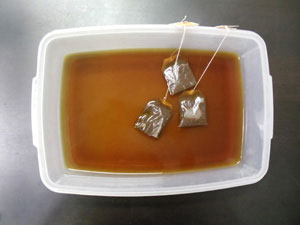
First things first: boil up some water to make your tea. Boil enough so that when you pour it into your container it’s at least an inch deep. My container is probably overkill for my itty bitty tag, but it’s what I had around.
As soon as the water's boiling, pour it into your container along with 2-3 tea bags. I’d recommend tea bags over loose leaf tea as it’s a lot less messy. Leave your tea to steep for at least 15 minutes, making a nice dark brew and allowing your water to cool.
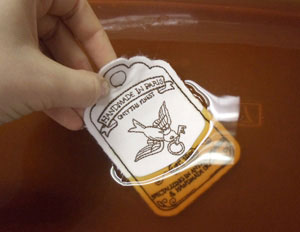
Once your tea is ready, grab that tag and dunk it!
Be sure to push it completely under the surface, and then let it sit in there for awhile. How long you let it sit depends on how dark you want the stain to be. Check your tag from time to time, making sure it stays covered, and take it out when it’s just a little bit darker than you want it, since it will usually lighten up once it’s dried.
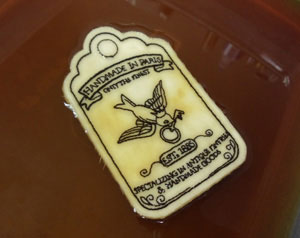
Remove your tag from the tea when it’s ready and set it somewhere to dry.
What’s really neat about an embroidered tag like this, is the tea tends to seep to the low areas away from the embroidery, leaving a neat, washed out look to the stain. It also gathers wonderfully at those raw edges on the tag, making them just a little bit darker than the rest.
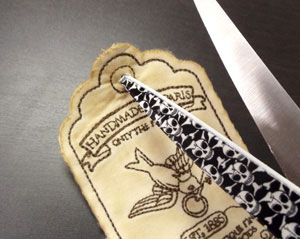
Once your tag is dry, grab a scissors and punch a hole through the little circle at the top of your tag.
Now, if you don’t have grommets or don’t care to use them, you can just string a piece of ribbon and cloth and call it a day.
If you do want to add a grommet, cut the hole large enough to allow the grommet ring through. Try to stay inside the stitched circle to prevent fraying.
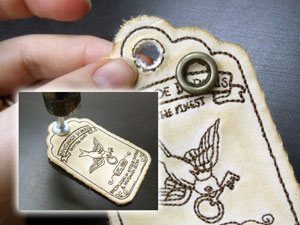
Once you’ve cut it wide enough, add your back and front grommet pieces, and using the grommet tools (carried in most craft and fabric stores), lightly tap on it with the hammer to secure the two sides shut.
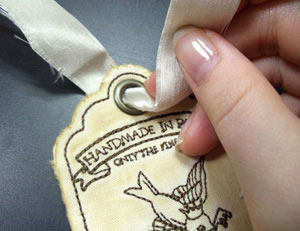
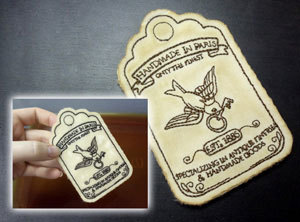
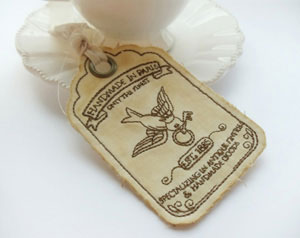
Finally, add your ribbon or raw fabric, and your tag is ready to hang!
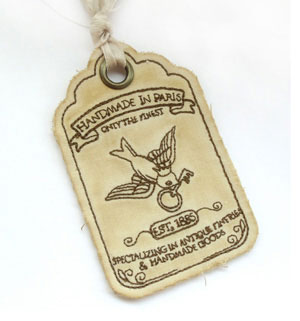
The tea dyeing really adds an amazing vintage effect to your little handmade tag, and raw edges and frayed silk only add to the delicate look of age.
Add your beautiful little tags to all your handmade gifts and goodies. It makes an extra special touch to any gift, and gives a little touch of old world charm.


