Ever find that super cute, but too large and slightly out of style sweater at a thrift store? Maybe you found a great deal off a clearance rack in three sizes too big. Or maybe you have an oversized sweatshirt that has been shoved to the back of your closet in sacrifice to the clothes gnomes. Follow this simple tutorial to glam up and slim down that old, baggy garment!
Supplies
To make your chic embroidered new sweater, you’ll need...
- Baroque Natura embroidery designs (I used the 4.88" x 6.89" version of the pack)
- An oversized sweater or sweatshirt
- A slim-fitted long sleeve shirt that fits you well, to use as a template
- Printed templates of the design for placement (here’s how to print templates)
- Seam ripper, scissors, pins, and tape
- Medium weight cutaway stabilizer and temporary spray adhesive
Designs Used
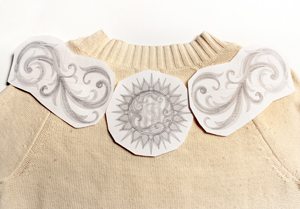
Start by planning where your designs are going on your sweater.
I used the sun and swirls designs from the Baroque Natura pack. The swirls are mirrored on either side of the sun to create a sort of sun flare. The color stops in this series allows you to play with the look of the design, so I transitioned the swirls from the color of the sun to a color closer to the sweater.
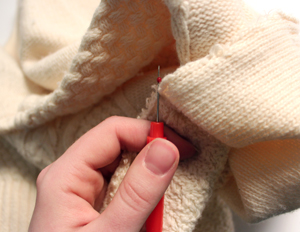
Since I planned to embroider the designs across the back shoulders of the sweater, I needed to open the sides of the sweater to hoop this. I used my seam ripper and opened the seams from the sides up through halfway down the arms.
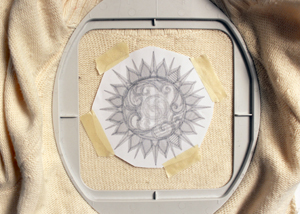
Spray a piece of medium weight cutaway stabilier with temporary spray adhesive, and smooth it onto the back of your sweater fabric. Hoop both layers tightly together.
Embroider your first design!
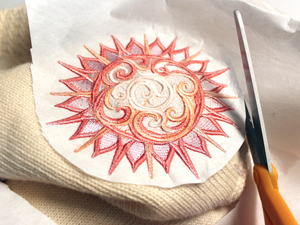
Once your design is done sewing, carefully un-hoop and turn it over. You’ll want to cut away the stabilizer after each design sews.
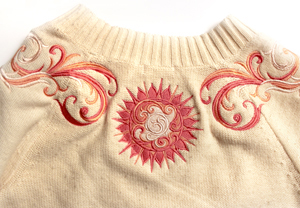
Continue stitching your designs until all the embroidery is done. Now it’s time to make it fit you right!
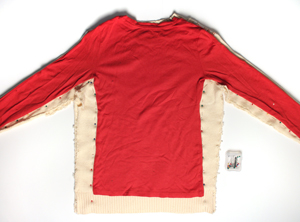
Once you are done stitching your designs, turn your sweater inside out and lay flat. You’re going to use your slim-fitted long sleeve shirt as a template, by laying it over the sweater. This trick may seem simple, but it’s really the easiest, most fool-proof way to get a totally custom fit!
Use pins to mark just a little off from the edge of the shirt, like shown. I’d recommend turning the sweater inside out and comparing its size to the shirt before sewing.
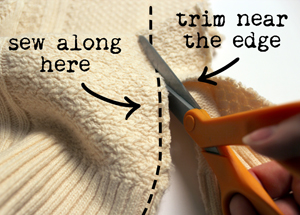
Once your sweater is marked, sew along the guides you made with your pins using a thread a similar color to your sweater.
When you’ve finished re-sewing your side seams, trim off excess fabric and turn your sweater right side out again.
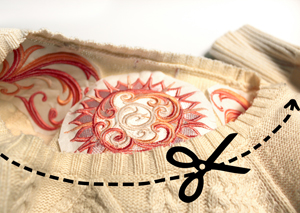
The fit is now custom made for us, but we can update this sweater in other ways too!
After resizing the sweater, I decided to give it a wider collar for a more modern look. I cut off the collar, leaving about a half inch to make a new edge with.
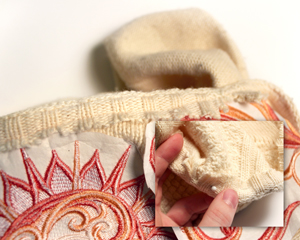
Fold that edge over, and pin it down, cutting notches every couple inches on the inside if needed so the edge will lay flat.
Sew a seam all the way around your sweater neck opening.

And you're done! Your sweater is now totally custom fit-for you, with a flattering new wide collar.
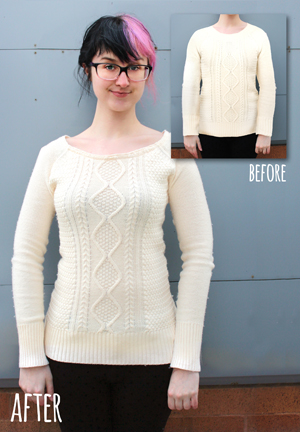
As you can see, it makes a big difference, especially if you’re working with a sweater that was way outside your usual size. Now there’s no reason to pass up a cute find just because it’s too big! Especially if it’s a bargain.
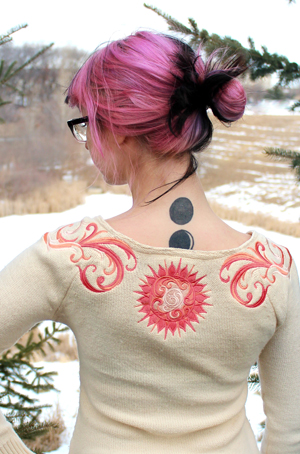
As a plus, your new chic sweater has some gorgeous custom embroidery to really bring it to life. Now it’s not only as good as a store-bought sweater in your size, it’s better!


