Craft a snuggle-worthy project with this simple plush kit! Sweet embroidered features combine with a PDF pattern and your favorite fabrics to make a one-of-a-kind stuffed toy. It's easy and so adorable -- we'll show you how!
Supplies
To craft your cuddly creature you'll need:
- A simple plush kit design. We're using Llama Plush Kit embroidery design.
- PDF pattern and embroidery placement guide for your chosen creature (click on the project pattern link below to download the PDF)
- Printed templates of the embroidery designs, to help with placement (here's how to print design files)
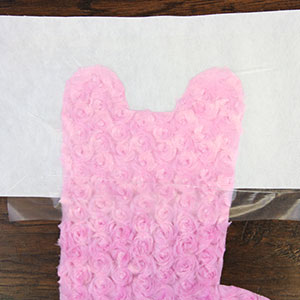
- 1 1/2 yards of faux fur for the body
- Fabric for the llama face applique
- Polyester fiber fill
- Medium weight cutaway stabilizer
- Water-soluble stabilizer for topping
- Temporary spray adhesive (such as Gunold KK100)
- 40 wt. rayon thread for embroidery
- Scissors
- Pins
- Air erase fabric marker
Designs Used
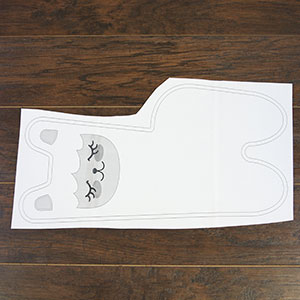
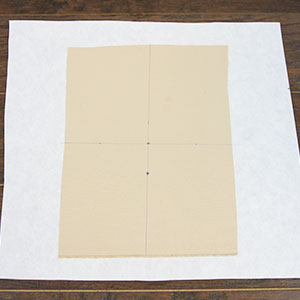
Begin by printing the PDF template for your creature.
The shapes will print out onto several pieces of paper, which you will need to cut out and tape together using the letters and arrows marked on the sheets.
There is also a placement guide included in the last page of each PDF with the rough layout of the embroidery pieces. You will also want to print templates of each embroidery design for placement, using embroidery software.

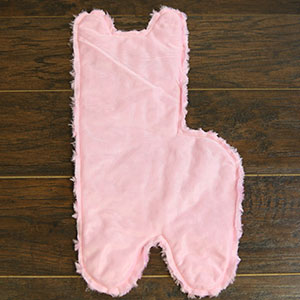
Use the paper plush shape templates to cut out the body pattern. Cut out a front and back piece.
If you are stitching the llama plush kit, continue onto the next step. If you are stitching the owl plush kit, skip the next five steps.
Using temporary spray adhesive, adhere a piece of medium weight cutaway stabilizer to the back side of the ear area of the pattern. Lay water-soluble stabilizer over the front ear area.
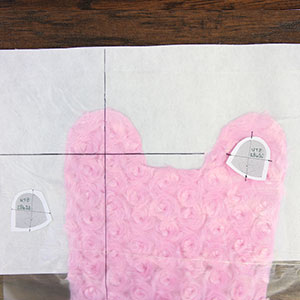
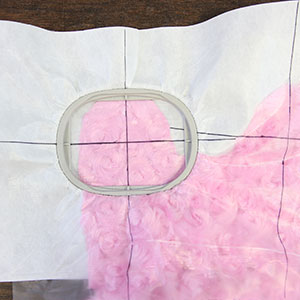
Cut out any templates that came with your design download. Use any templates to mark placement.
If stitching the llama, load the ear design onto the embroidery machine, then hoop all three layers taut.
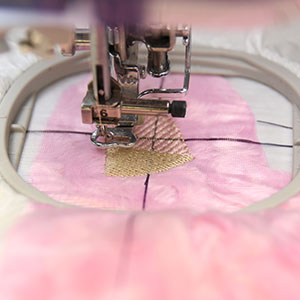
Attach the hoop to the machine and sew the ear. Repeat the previous steps, mirroring the ear placement.
After both ears have sewn, remove the hoop from the machine and remove the excess stabilizer from both sides of the fabric.
Place a piece of medium weight stabilizer on the back of the applique fabric and mark placement for the applique face design.
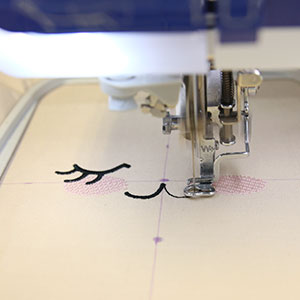
Hoop the fabric taut, return the hoop to the machine and sew the face design (for the llama) or the stomach design (for the owl).
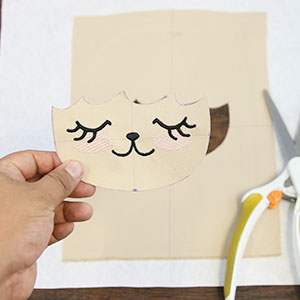
Once the design has sewn, unhoop the design, trace the applique template to create a guide for cutting around the stitched piece, and cut away excess fabric.
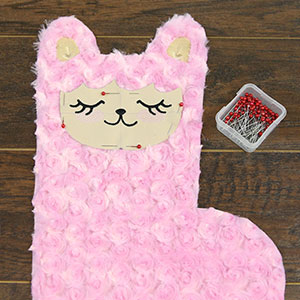
Position the first applique piece on the animal body and pin to avoid shifting. If you are sewing the owl, you will want to attach the tummy piece first.
Use matching thread to sew the applique piece in place. Leave a 0.25" border along the edge.
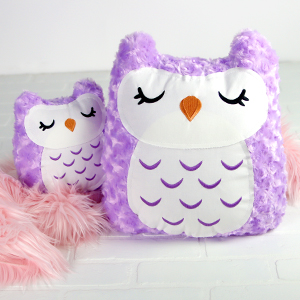
Some plush kit designs (like the It's Owl-right Plush Kit) have multiple embroidered applique fabric pieces. Repeat the last five steps until all fabric pieces have been stitched, then proceed onto the next step.
Other plush kit designs (like the Kitty Cat Plush Kit) have applique fabric pieces with no embroidery. In this instance, cut out the applique fabric pieces and attach them to the front body pattern piece where indicated in the pattern diagram, then proceed to the next step.
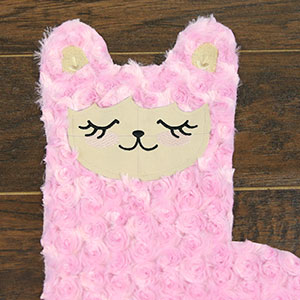
Place the back panel of your creature body face down, over the front of the front panel and pin both pieces together. Use matching thread to sew the panels together.
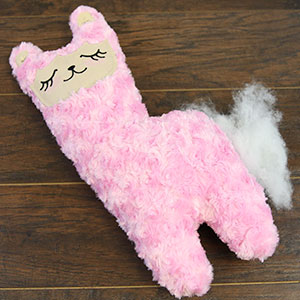
Leave a 3" opening to turn the design right side out and stuff with polyester fiber fill. Make sure to work the polyfill into all of the crevices.

Finally, use a straight stitch on your sewing machine (or hand stitch) the side opening closed.
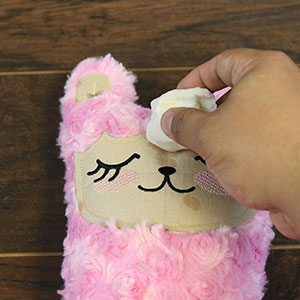
Use a damp cloth to remove any marks from your design.
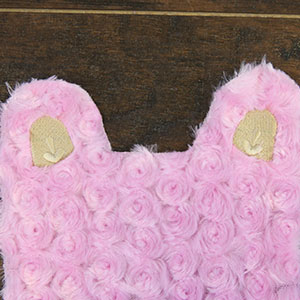
Your adorable animal is complete!


