Craft a sleek, modern twist on Christmas decor with these pretty tabletop trees! Stitch each delicately decorated fabric tree in-the-hoop, then slip over a wooden base. Make just one, or create a whole forest of festive trees!
Supplies
To create your Tabletop Tree you'll need:
- In-the-Hoop Tabletop Tree embroidery design
- 13" x 13" piece of microsuede or other non-fraying fabric
- 40 wt. rayon thread for embroidery
- Medium weight tear-away stabilizer
- Medium weight cut-away stabilizer
- Temporary spray adhesive (such as Gunold KK100)
- Scissors
- 3/8" x 12" wooden dowel
- 5" x 5" round wooden plaque
- Drill and 3/8" drill bit
- Pencil to mark drill area
- Printed templates of the dieline files that came with the design download (these will have "DL" in the file name)
Designs Used
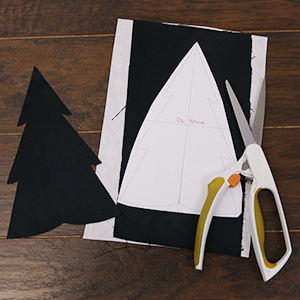
First, print the dieline files that comes with your design. This file will always have "DL" in the name. (Click here for instructions on how to print or stitch dieline templates.) The Tabletop Tree design we are using has three files - one is the full embroidery file, and the other two are dieline files.
Spray the back side of the dieline templates with temporary spray adhesive, and smooth them onto the fabric. Add cutaway stabilizer to the back of the fabric to prevent fraying, then cut out the shapes and remove the paper.
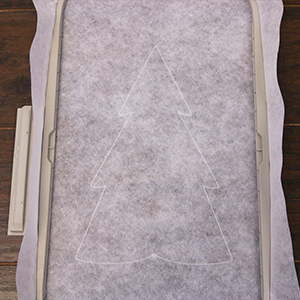
Once all of your pieces have been cut, hoop a piece of tearaway stabilizer taut. Use a size 11 or 75/11 sharp sewing needle rather than an embroidery needle (a sharp sewing needle has a smaller, finer point than an embroidery needle, so that it will make smaller perforations in the stabilizer).
Attach the hoop to the embroidery machine, and load the full embroidery design file into the machine. The first thing to stitch is a dieline that shows were to place the front felt piece.
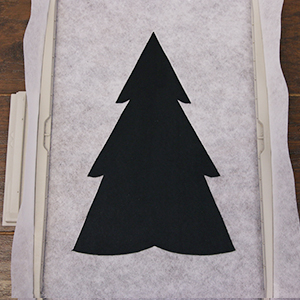
Remove the hoop from the machine, but do not unhoop the stabilizer. Spray the back side of the front fabric piece with temporary spray adhesive, and place the fabric right inside the dieline.
Attach the hoop back onto the machine and continue embroidering the design. The next step will tack down the fabric.

Follow your color change sheet and continue to stitch the remaining details. Watch for the step that says "back piece tack down". When you reach this step, remove the hoop from the machine once again, but do not unhoop the stabilizer.
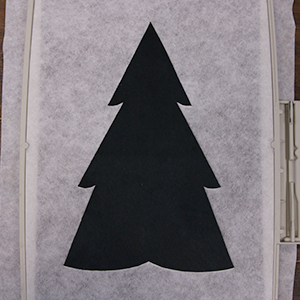
Lay the hoop face down and spray temporary adhesive along the edges of the back fabric piece. Place it right inside the dieline.
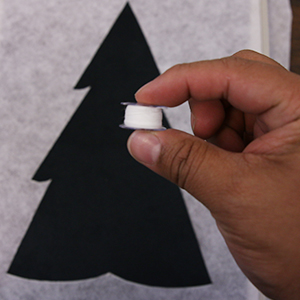
Since both sides of the ornament will be visible when complete, wind a bobbin with the same color used in the needle.

Attach the hoop to the machine and continue embroidering the design. A tackdown stitch will sew next, binding the layers together and leaving an opening at the bottom of the design.
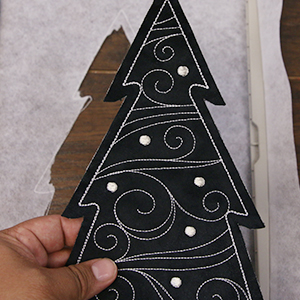
After the design is finished sewing, remove the hoop from the machine and gently tear the design away from the stabilizer. The outline stitches will be removed with the stabilizer. Remove the excess stabilizer as needed.
Now to make the tree stand! You can find the pieces for your wooden stand at your local hardware store, and at most craft stores.
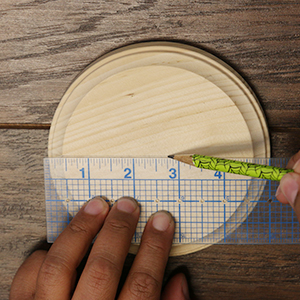
Lay the round wooden plaque face up, and use a pencil to mark the center.
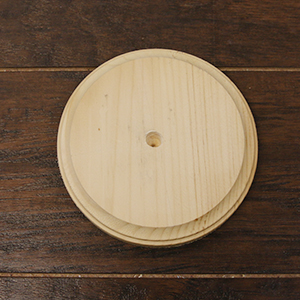
Use a drill with a 3/8" drill bit to create a 1/4" to 1/2" deep hole (to place the wooden dowel in), and clear the sawdust.

Remove the pencil marks with an eraser and place the wooden dowel in the hole. (Use wood glue, super glue or hot glue stick to make this a permanent fixture.)
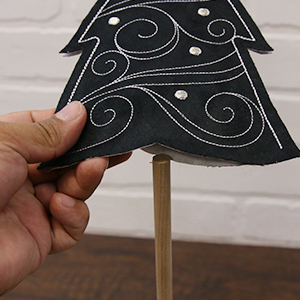
Using the opening at the bottom of the design, pull the design over the top of the dowel, so that the tree balances evenly on the stand.
Your Tabletop Tree is ready to make your holidays shine!


