


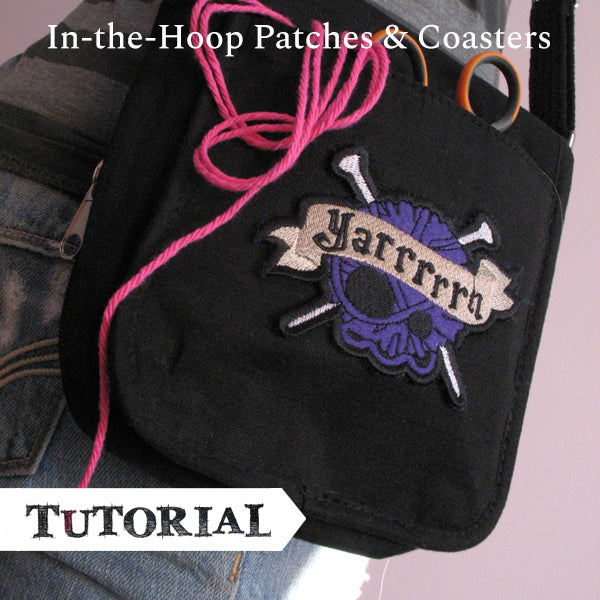
Learn how to make your own patches, coasters, and magnets with a step-by-step tutorial.
Supplies & Materials:
Supplies
- Fabric to form the base of the design (felt can be a good choice, or a sturdy cotton canvas or duck cloth).
- Temporary spray adhesive
- Heavy duty water-soluble stabilizer (we suggest using Vilene or Sulky Ultra Solvy)
- Medium weight cutaway stabilizer
Option items:
- Patch glue (available at most craft stores)
- Hot glue
- An item for applying your patch
- Clear vinyl if your patch has vinyl applique
- A magnet (if using your patch or coaster as a magnet)
Tools
- Embroidery machine
- Iron and pressing cloth
- Optional: Hot glue gun
Embroidered patches and coasters are time-honored classics, one that are easy to share with others. Plus, they are often interchangeable with just a few quick steps, meaning that you can use patch designs as coasters, or coasters as patches. Both coasters and patches stitch completely in-the-hoop, leaving you with a finished product, personalized with your choice of fabrics and threads. We'll show you step-by-step how to put your patches and coasters together! (Plus, read to the end to see how to turn your design into a magnet.)
Gather Materials:
You will also need a patch or in-the-hoop coaster design. Here we are using Yarrrrrn - Knitting and Clean Dish Dirty Dish as examples. The Mug Rug (In-the-Hoop) design is also briefly shown to demonstrate fringe.

When you download your in-the-hoop design, it will come with two or three files – the regular embroidery design (in this case, UTZ1070), plus a dieline file to give you the fabric shape. These extra files will be labeled with "DL," "DLa," or "DLb". You can either print your dieline files at full size using embroidery software, or just stitch it onto your fabric.
Find more information on printing and stitching dielines here.

First, spray a piece of cutaway stabilizer with temporary spray adhesive, and smooth it onto the back of your fabric. This will make your finished patch or coaster a bit sturdier.
If you’re sewing the dieline, you’ll need your fabric and stabilizer large enough to hoop. If you are cutting it out, you only need the fabric piece to be larger than the dieline.

If you have printouts, spray the back of them lightly with adhesive and stick it on top of your fabric.
If you’re sewing your dieline, hoop up your applique fabric and stabilizer and load up the dieline file on your embroidery machine. Stitch it out.

Start Embroidering:
Carefully cut around the dieline(s). Then gently peel off your paper (if you're using it). When you’re done you should have your shape cut out of fabric on one side and cutaway stabilizer on the other.
Now you're ready to stitch your design! Hoop a piece of heavy water-soluble stabilizer and load the design onto your embroidery machine.

If you are stitching a design with a backside (such as the Clean Dish Dirty Dish or Merit Badges designs):
First, a dieline will stitch onto your water soluble stabilizer to show you where to place your fabric. Spray the back of your fabric piece generously with temporary spray adhesive, and stick it carefully inside the stitched dieline.
Once your fabric is set, your machine will stitch a tackdown stitch all the way around your patch to hold the fabric in place. After that, all of the inside elements will sew.
Finally, you will need to remove your hoop (do not unhoop the fabric), turn your hoop over, and carefully place the back fabric piece with temporary spray adhesive. This will be followed by a second tackdown and satin stitch border all the way around your design.


If you have a design that does not have a back piece, the satin stitch border will immediately follow your inside details, and your design is done.
If your design has vinyl applique, like our Sass Tablets design, check out our Vinyl Applique tutorial for more information about adding it to your design.

If the design has fringe, follow the next two steps. If not, skip ahead.
After the embroidery is finished, turn the design over so the back is facing up. Carefully cut through the outer edge of each fringe satin column (the edge opposite the tackdown satin) using a small pair of scissors or a seam ripper. Make sure to only cut the rayon embroidery thread and not the bobbin.

Then turn the piece right side up and fluff the fuzzy fringe with the point of a pair of scissors. This will free it from the stabilizer. Continue until all the fringe portions are cut and fluffed.

Now, carefully tear the design from the stabilizer, removing any excess pieces at the corners or edges, and use scissors to remove any excess stabilizer from the back.
Bonus tip: Did you know that in-the-hoop designs can be used as standard machine embroidery designs, too? We have project instructions to show you how.

If you are using your design as a patch, it is now time to apply your completed patch to your chosen project. To do this, you can either sew the patch directly onto your item, use hot glue, or use patch glue and an iron (for items that will not fit on a sewing machine). For this tutorial, we are using patch glue.
Grab your patch glue and apply a generous coating to the back of your design. Be sure to get near the edges and cover the back of your patch entirely. Then, let the glue dry.
It is important to note that your glue has to dry completely before it can be ironed. Be sure to read your manufacturer's instructions for the amount of time needed for your glue to dry.

Once the glue is dry, carefully place the patch onto your item of choice. You may want to use a ruler if you are looking for exact placement. You will also want to want to find a thin piece of fabric to use as a pressing cloth. Using a pressing cloth will protect the patch from damage that may be caused by the iron.

Place your pressing cloth over your patch and press with a hot, dry iron for about 60 seconds, or until the glue has started to melt. Do not use steam.
For best results follow the instructions on your bottle of patch glue and adjust accordingly. Make sure your pressing cloth isn’t too thick, either. This may prevent the heat from getting through.
When testing the bond, don’t pick at the glue too much when it’s hot. Allow the patch and glue to cool, then test to see if further ironing is needed to adhere the edges.

Your patch is now finished!

Bonus: Any patch can be turned into a magnet, too! Instead of adding patch glue to the back, just add a dab of hot glue to a magnet (available at craft and hardware stores).

Then stick your magnet on the back of your patch. (Adhesive magnet tape will work great for this, too.)

Display your finished magnet wherever you like - we placed ours on the dishwasher.

Gather your gold stars and take your patches a step further by adding ribbons!

To add that bit of extra flair, you will need:
- Your patch design (we used the Achievement in Adulting design)
- Hot glue gun & glue
- Scissors & pins
- Access to a sewing machine
- 1-2 yards of various sizes of ribbon

To begin, take just over a yard of 1.5 inch ribbon (or whatever ribbon you are using to go around the badge) and begin folding it over.

Use pins to keep your loops and folds in even place and stitch 0.25 inches up from the bottom all the way to the end.

Once your ribbon is stitched, use hot glue to work your way around the back side of your embroidered patch.
NOTE: If you have a raw edge on one side of your ribbon, make sure to tuck it behind the finished edge, so it doesn't show on the front side.

Next, grab varying sizes of ribbon and cut into 8 inch pieces. Fold each ribbon in half, then finish off the tips by cutting a small triangle into the edges.

Use your hot glue to adhere each of the ribbon layers together and then to the back of the patch.
Finish the piece out by attaching a pin or clasp so the patch can be worn!

Get Inspired:
Show off your embroidered patch award!
