Critters of real and make-believe lands are all part of the fun of growing up, and there's no more fun way to celebrate them than to BE them when you can. With these easy Noggin Nanimal face designs, you can create fun and funky hats for little (and big!) imaginations. This tutorial will show you how to easily assemble the hat to create your new critters.
Supplies
To make your Noggin Nanimal hat, you will need:
- Your favorite face design from the Noggin Nanimal applique embroidery collection, sewn on a large piece of jersey fabric
- Extra jersey fabric for the back of the hat
- Small pieces of fabric for the applique parts of your design -- fabrics such as felt and fleece won't fray
- Cutaway stabilizer
- Printed template for hat pieces (linked below)
- Pins and scissors
- Optional: matching felt if you wish to make your Nanimal's ears to stand up a little straighter
Each Noggin Nanimal is just a little bit different, so we'll be going over the basics of a hat, plus the specifics of each nanimal. A note on fabric as well - cotton jersey knit works best, as does any knit with some decent stretch. Too little stretch and it won't expand enough to fit a head.
Designs Used
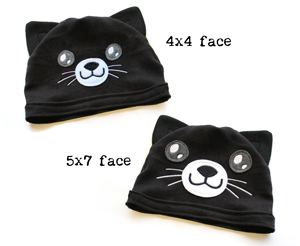
While we're talking about faces, let's also talk about the different sizes and formats this design comes in. No matter your hoop size or preference, you can make a hat to suit your needs!
There are two sizes of the faces -- the smaller size is good for newborns, and the larger size best suits toddlers and slightly older kids. As you can see, both are super cute!
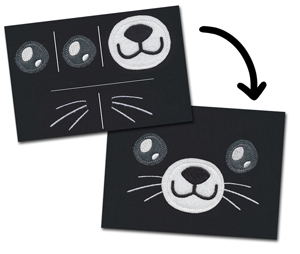
For those with 4"x4" hoops who wish to make a larger size face (like the kid/toddler version above), there's another option -- split versions for each face available that can be assembled together to make a whole. For some pointers on stitching and placing multi-piece designs, check out this tutorial.
These split versions also afford the opportunity to do some customization of the face. For example, you can space the eyes closer together or farther apart than the standard set design to make your face exactly the way you like it.
So let's start making hats...
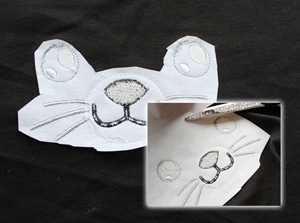
Spray a piece of cutaway stabilizer with temporary spray adhesive, smooth it onto the back of your fabric, hoop both layers taut together, and embroider your critter face! These are raw edge applique designs -- refer to this tutorial for basics on stitching raw edge applique.
You're going to want to remove as much of the stabilizer from the back of your stitched design as possible. Do this carefully, pulling it away from your design as you cut, so you don't accidentally snip your fabric.

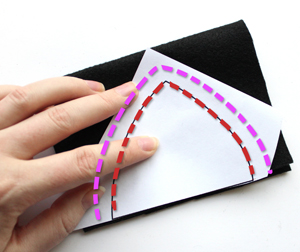
Next you're going to want to place your template. Download the PDF from the link above of the hat templates, and print out the template you'll be using. Each Nanimal has its own template. When placing it, keep in mind that generally you want your animal face higher up on the hat shape, so we have room to roll up the bottom edge. There's a rough guideline printed on each template for the placement of the face.
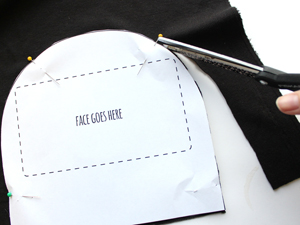
Where you cut on your template is also important. Cutting right on the printed dieline will make a hat suitable for infants and very young toddlers with smaller noggins.

If you're looking to make a hat for a mid-sized toddler (or an infant with a larger head), it's a good idea to add a half inch to the edge of your template, like so.
Hats for young kids will need at least an extra inch.
Once you have your front piece ready, cut a matching piece out of the same fabric for the back of the hat. Make sure you're following the same dieline sizing for each piece.
Next come the appendages. For all Nanimals, these are simply made by placing the template over a folded piece of fabric, so you can cut two pieces at once.
Again, the size your cut depends on your chosen hat size. If you used the printed template edge before, do so again now. If you added extra around the edge, you'll also want to do that with each appendage.
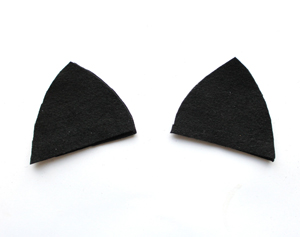
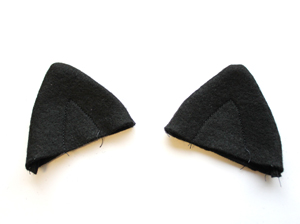
Here are two of my kitty ears with the two sides stacked on each, ready to be sewn together.
If you want to give the ears a bit more stability, you can cut a piece of felt the same shape as each ear, and add it to the top of the stack. (That way it'll be inside after you stitch and turn.)
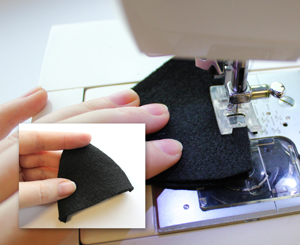
Sew a seam around your first ear or appendage, leaving the bottom open.
Turn it right side out through the opening.

If you wish to add a little extra dimension, you can stitch on some ear details, running a seam near the folded edge.
Once your animal accessories are ready to go, it's time to place for them on your hat for sewing!

For the kitty, your ear placement will look like this. Make sure the edge of each piece is going slightly over the edge so it's sure to be caught by the seam.
We'll cover the other Nanimals in a moment.
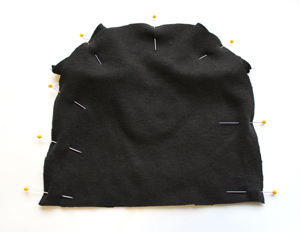
With your ears and/or other accessories in place, cover up the stitched face with the other piece of your hat, right side facing down. (So your hat is inside out.)
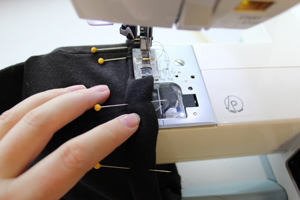
Since we're working with stretchy jersey knit, I like to use a lot of pins to make sure my layers don't shift and stretch on me.

Sew a half inch seam around the curved edge of your hat, leaving the bottom open. When you're done sewing your seam, clip any excess fabric from your ears or accessories before turning it right side out.
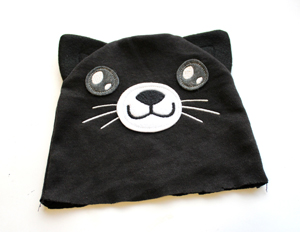
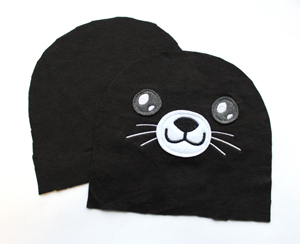
Kitty! Ready to have the bottom edge finished.
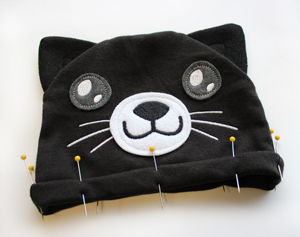
Fold the bottom hem up once, and then over itself again, so the raw edge is completely folded under. Pin this in place flat around the whole hat. It should make a flat band a little less than an inch tall.
Sew a seam once around the top edge, and once around the bottom to secure everything in place.
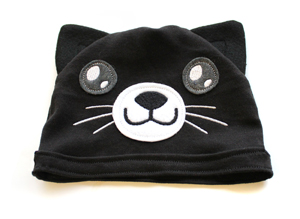
And your hat is complete! It's pretty straightforward really.
Now, how does this work for the rest of the Nanimals?
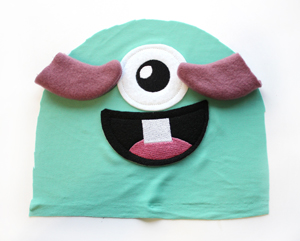
For the monster, his/her horns should be placed like so before the hat is sewn together.
Then just follow the same directions to turn right side out and sew the bottom hem.
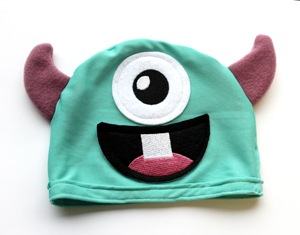
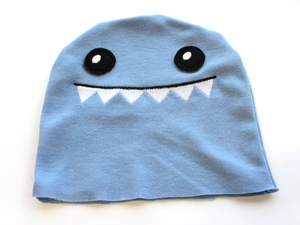
Your finished monster will look something like this!
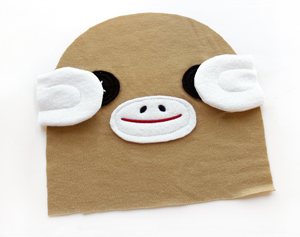
The sock monkey's ears look best out to the side, like the classic plushies.
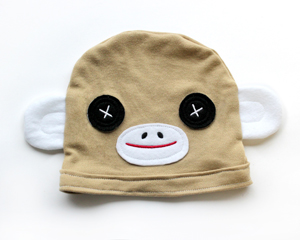
So he looks adorably vintage when complete!
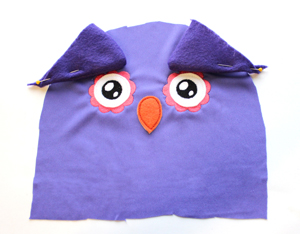
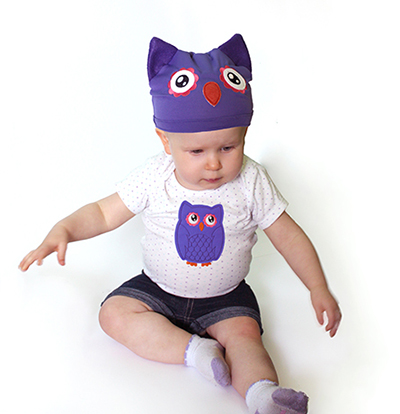
The owl's ears may look somewhat similar to the kitty, but you want the finished ears pointing straight up instead of out like angles, to give it a more fitting look.
In order to get them pointing the right way, pin them like so before sewing.
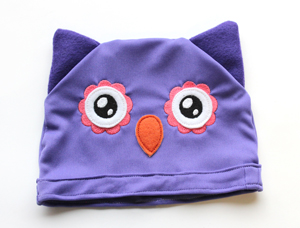
And when you're done your owl will look like this!
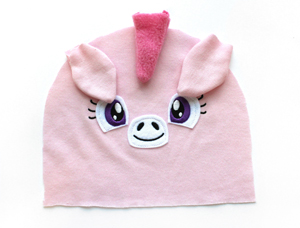
The unicorn adds one extra step with the addition of her horn. It's easy though, just place the horn in the middle of the head, between the ears.
And there you have your unicorn! Fun tip, if you leave off the horn, this makes an excellent pony as well.
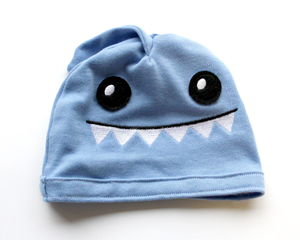
Finally, our little sharky hat is special, since his/her accessory does a perpendicular direction to the others.
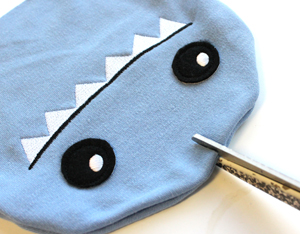
With your hat right side out, snip an opening in the middle top of your sharky hat. Widen it about 4 inches or so with a 2 inch cut in the fabric.
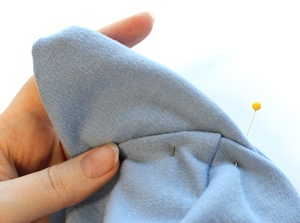
Slip your fin through the opening, and fold the raw edges of the hat against the fin. You don't have to get it perfect right away, this is just to roughly hold it in place.
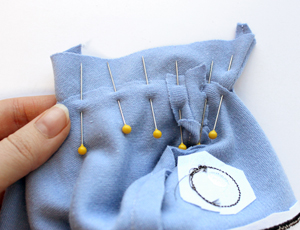
When you have the fin held in place, turn the hat inside out and begin more carefully pinning the raw edge of the hat to the fin. Make sure you catch both sides.
How far up the fin pops out of the hat is up to you! Just make sure it fills in the opening you cut.
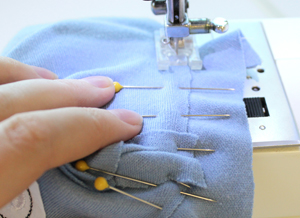
With everything pinned in place, sew a seam along the edge of the opening. Start a little before the opening and end just a little past it, so everything gets closed up nice and neat.
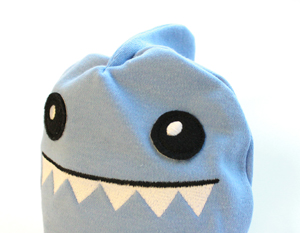
When you turn your sharky right side out again, he's got his fin all ready to go!
A note, this face also makes an excellent dinosaur. Just change the fin from one spike to several small ones and you've got a chompin' dino just as easy!
Once you have the middle fin in place, you can finish up the bottom edge of the hat as usual
And don't forget, each Noggin Nanimal has a little applique version too, which makes the perfect accents on tees and tops when rocking the new hat.
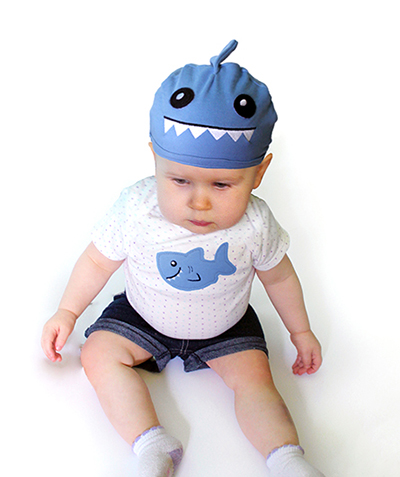
Each critter has a fun personality, like this toothy shark who packs a friendly bite.
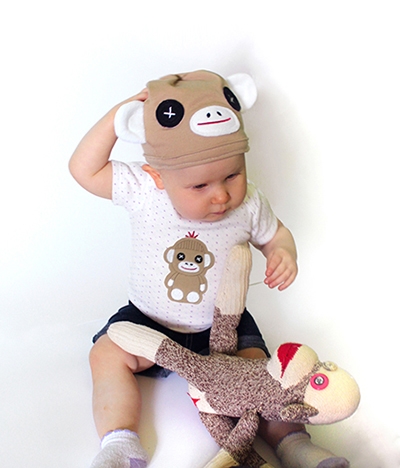
Or this cheeky monkey, who even matches a favorite toy!

This little kitty is sure to be a favorite around the house with furry friends.
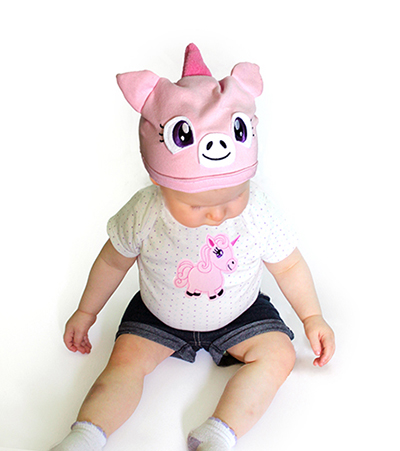
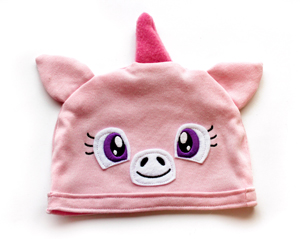
And the magic of the unicorn can't be denied. Remember, you can skip the horn and just create a cute pony hat too!
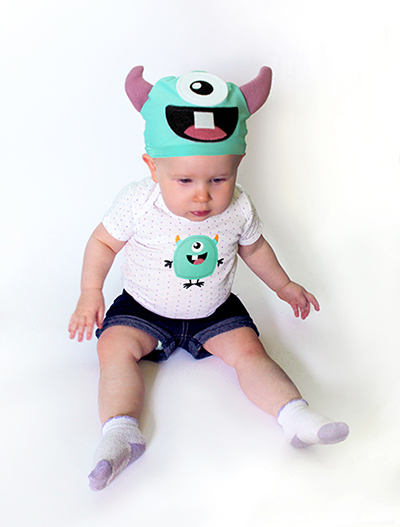
Finally, don't let your little monster pass up the opportunity to really show off with horns and everything
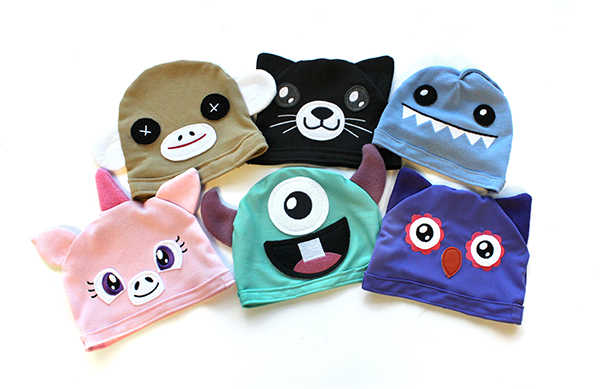
So no matter the size of the noggin, or the preference of the Nanimal, one of these little guys is sure to suit your project!


