Take a modern approach to patchwork with in-the-hoop quilt block machine embroidery designs! They look a lot like traditional piecing, but these clever blocks come together entirely on your embroidery machine. We'll show you step-by-step how to use these unique designs!
Supplies
To create your in-the-hoop quilt block, you will need:
- In-the-hoop quilt block embroidery design (we're using the Owl Quilt Block)
- Quilters cotton for the base of your quilt block
- More quilters cotton for the applique details on your quilt block
- Thread to match your fabric colors
- Printed template of the dieline file (here's how to print templates)
- Medium weight cut away stabilizer
- Temporary spray adhesive
- Ruler
- Tailor's chalk or air erase marking pen
- Scissors
Designs Used
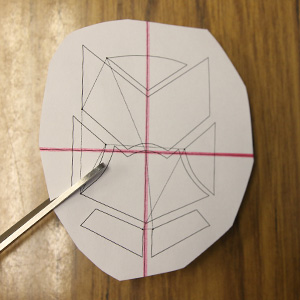
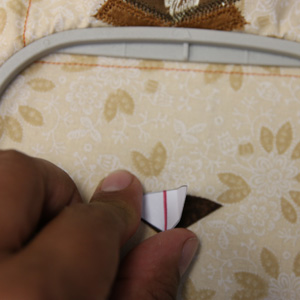
Start with the printed dieline templates. Cut the template out...
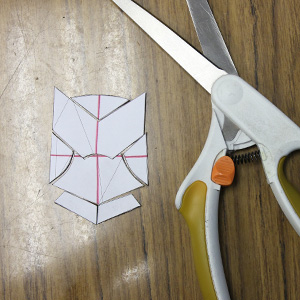
...and separate each section of the design.
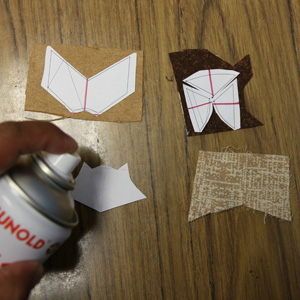
Lightly spray the back of each template with temporary spray adhesive and put it onto the right side of your fabric. Carefully cut along the dieline to get an accurate applique shape.
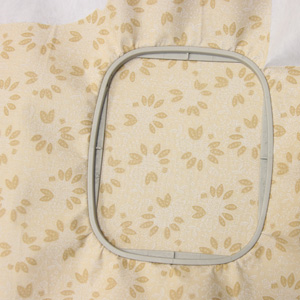
Now to create the quilt block. Spray the stabilizer with temporary spray adhesive and adhere it to the back of the quilters cotton, then hoop both fabric and the stabilizer taut together.
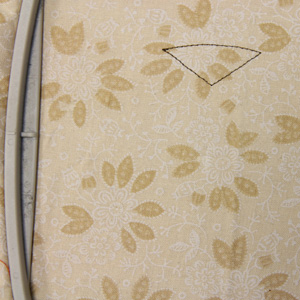
After the design file has been loaded onto the embroidery machine, start stitching. The machine will stop after the first step stitches out. This will be the dieline, for applique placement.
Lightly spray the fabric piece with temporary spray adhesive and carefully place it within the stitched dieline area.
Repeat this step as the design continues to sew out.
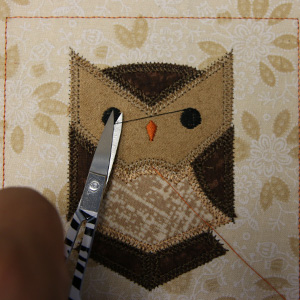
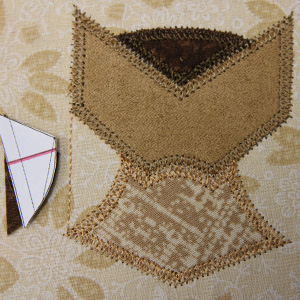
Trim loose threads, then place the fabric onto a cutting mat. Use a quilting ruler and rotary cutter to cut along the sewn cut lines of each block. (Feel free to use scissors to cut, if a cutting mat or rotary cutter aren't available.) Repeat this step as needed.
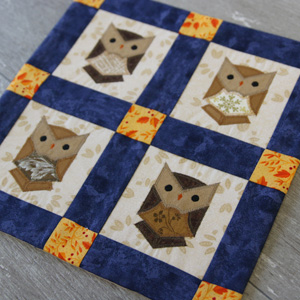
Stitch as many quilt blocks as you like, and mix and match them to create your project! A quick sketch before you start can give you confidence and direction as you start stitching. Each in-the-hoop quilt block downloads with a PDF planning sheet to help you design your own quilt using the design.
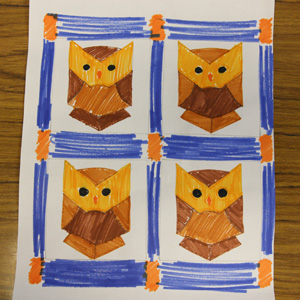
For this owl mini quilt, I am using the same design for each quilt block, changing an element of the design to give each block its own character. In this case, I am using a different fabric for the owl's chest, wings and crown.
In-the-hoop quilt blocks can be mixed-and-matched and combined with other piecing techniques to create quilts, pillows, wall hangings, and more that are as unique as you are. Check out our Designing a Quilt for Machine Embroidery tutorial for more ideas and inspiration!
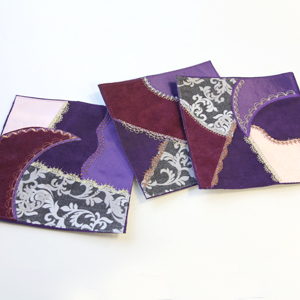
Use these instructions to assemble the in-the-hoop crazy quilt blocks as well. For these designs, the fabric pieces will extend almost all the way to outer edges of the block. A cutting line will sew last around the block – use this line to cut out the blocks.
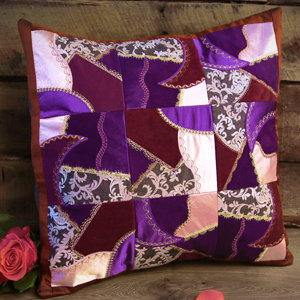
Have fun arranging the in-the-hoop crazy quilt blocks for unique effects and patterns. As you plan your quilt, mix and match different fabrics, prints, and textured fabrics. We used a combination of satin, velveteen, faux suede, and quilter’s cotton! As you assemble the rows, simply rotate the blocks to give a different look each time!


