Letters are really wondrously flexible things. No matter their style, they can be used to make big statements of all kinds to bring home decor to life with a sentiment that’s all your own. Bright, bold, mixed and colorful, this diverse Letter Perfect Alphabet comes together in a chic way with a big long statement pillow for your couch. You can make it say anything you wish, and it’s easier than you think to make. Plus, we’ll show you other simple and stunning ways of using your letters for all kinds of projects, from more home decor to easy personalized gifts.
Supplies
So, for our big bold statement pillow, you’ll need:
- Long fabric to cover your pillow, plus a little for scrap
- Two or more rectangular pillow forms
- Cutaway stabilizer
- Letter Perfect Alphabet embroidery designs to spell out your chosen word
- Printed templates of each letter, for placement
- Scissors and pins
- Hot glue
- Polyfill stuffing
If you’re lucky enough to find a pillow form long enough for your whole word, good for you! But we’ll show you how to combine some if you’re not so lucky.
Designs Used
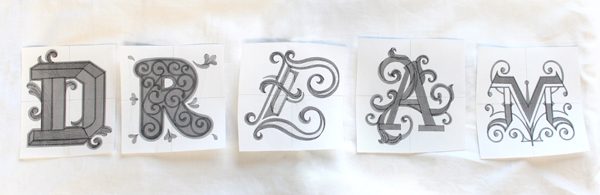
First of all, you’ll want to lay out your word. I’m using the 5"x7" versions of each of my letters here, but you may choose to go bigger or smaller with yours, depending on hoop size. The word itself will also determine how big your pillow needs to be, so it’s best to lay it all out before you cut anything to size. When you have your letters where you like them, tape each template in place to keep it as a guide for placement. Want some tips on how to perfectly align your letters? Check out this tutorial.
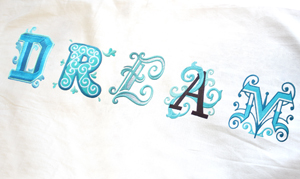
Stitch your designs out one at a time, re-hooping for each letter. This is what my letters looked like all stitched out on the fabric.
OK, so now here’s a sneaky little trick. These big long pillows are super chic right now, but it’s not so easy to find a pillow form long enough to accommodate it. What do you do?
Combine two into one! It’s an easy and cheap no-sew hack that will make your two forms appear seamlessly as one long one when we’re done.
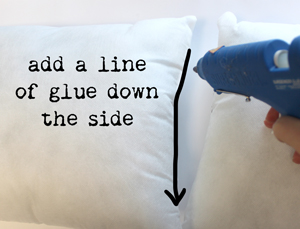
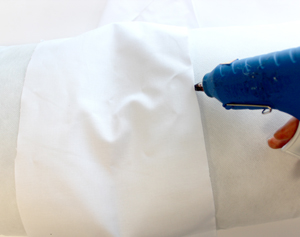
To start, grab your hot glue gun, and run a generous line of glue down the side seam of one of your pillows.
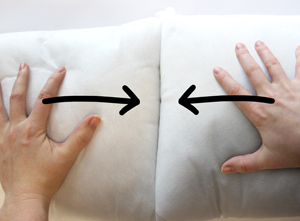
Quickly push your two pillow seams together, letting the glue hold them in place. Just make sure the top and bottoms line up evenly. This is mostly to hold it in place for now.
Hot glue sticks surprisingly well to these things, but if you want a little extra security, you could add a few strong stitches just to make sure the two forms don’t pull apart during heavy use.
Now, to blend that gap...
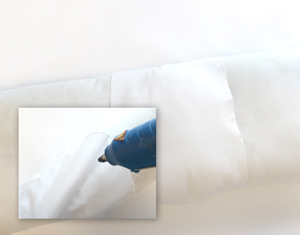
Cut a scrap piece of fabric that’s the same color as your pillow forms, long enough to wrap around them.
Use hot glue to secure the raw edges to each side of the gap, directly to the pillows. Secure it around the front, bottom, and back, but leave the top open for now.
While this isn’t as permanent as sewing, it works perfectly fine as the whole thing will be contained inside our pillow case soon.
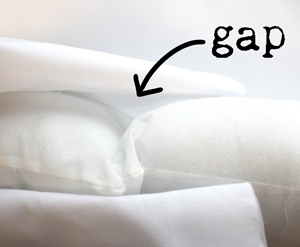
So, you’ll notice when you look at that opening at the top, there’s kind of a gap between your fabric and the pillow forms. It’s time to fix this!

Carefully fill that gap with polyfill stuffing, spreading it out to the edges so your new patch now lays flush and smooth with the rest of your pillow form shape.
When it’s stuffed evenly front and back, fold over the top of your fabric patch and hot glue it in place.
When you’re done, you should have two pillow forms as one, with your simple fabric patch in the middle smoothing out the gap between the two.
When this is covered with our pillow case, you’ll never be able to tell it’s two pillow forms.
OK, so now that you know the completed size of your pillow form, you can cut your fabric to size. You’ll want about a half inch seam allowance on the sides of your pillow, but enough fabric on the top and bottom to generously overlap at the back of your pillow form.
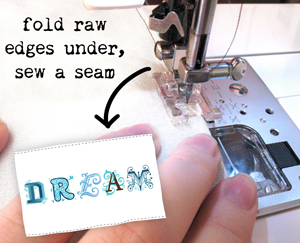
First, we’re going to clean up those two top and bottom edges, because they will be visible at the back of our pillow. Fold those raw edges under twice, and sew a seam along the top and bottom to give those sides finished edges.
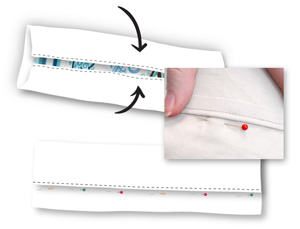
The best way to work out your next sizing is to wrap your embroidered fabric over your new pillow form, and mark at the back with pins where the overlap should stop -- that way you know exactly where it should be pinned in place for sewing. You want those two edges to overlap enough that when you pillow form is inside it still stays covered and snug.
Remove your form, and using your markers, pin everything right side together for sewing.

Sew those two short sides closed.
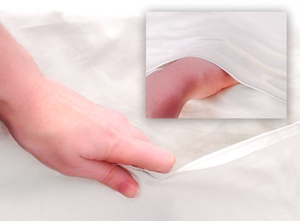
Now all you have to do is turn your cover right side out through that flap, and tuck your new pillow form inside!
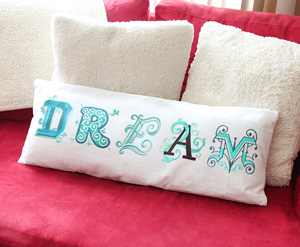
And now you have a big grand statement, in coordinating colors and with a sentiment that is all your own. There are all kinds of words that are great for this. "Dream" is great for the bedroom or couch. Maybe “create” for the studio. Whatever word you like you can make, and this is sure to catch the eye even more than a regular pillow would.
Go big and bold!

Want even more ideas? The possibilities for these eclectic letters doesn’t stop there. Pillows are a great medium for spelling out fun decor, but there’s so much more that they can do. Here are a few more super easy ways you can use your new Letter Perfect Alphabet designs...
You can still go big and bold with letters if you pick just a 4 letter word. “HOME”, “LOVE” “NEST” and “MAKE” are all fantastic ideas and perfect for laying out on a regular pillow form.
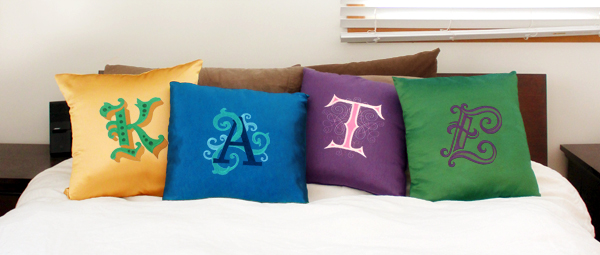
If you want to go even bigger, why not make a whole bunch of pillows to spell out an idea? Multiple pillows in a bedroom is a great place to customize names and ideas. Make your bedroom truly yours with letter pillows! Make you can even make a whole bunch of letters and spell out fun new messages each day.
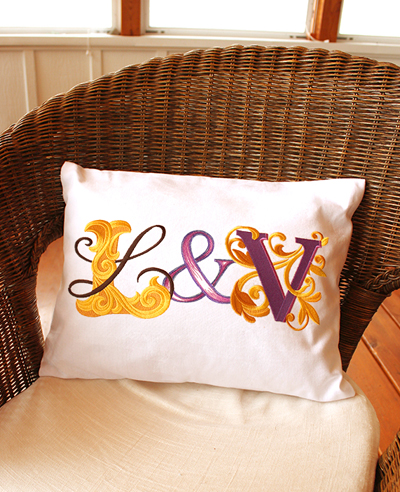
These elegant letters make wonderful mementos for weddings and other monogramming occasions. Use the ampersand and two letters to join two names into one. Add a date to the pillow to mark a special occasion, and maybe even try stitching it all in white for a tone-on-tone effect, or match it with the wedding colors.
The newlyweds are sure to appreciate this cozy and handmade way to remember their special day forever.
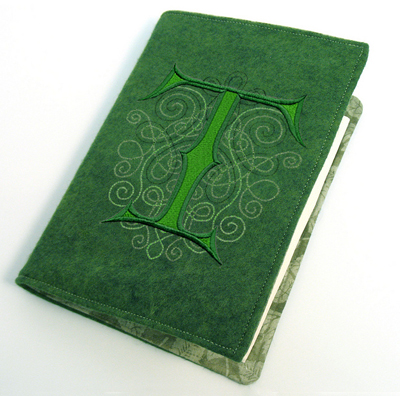
In fact, pretty much any project can be personalized with these letters! This is a cozy e-reader cover personalized with a pretty letter. You’ll be sure to know which one is yours with a cover like this!
Check out this tutorial for how to make your own e-reader cover.

Want a simple way to dress up a room without stitching everything on pillows? Stitching out baby names or just the ABCs and framing them above a crib or bed is a super cute way to add embroidery to your decor in a more subtle way.
Match your colors to your nursery or bedroom, and let kids spell out their names or favorite hobbies!
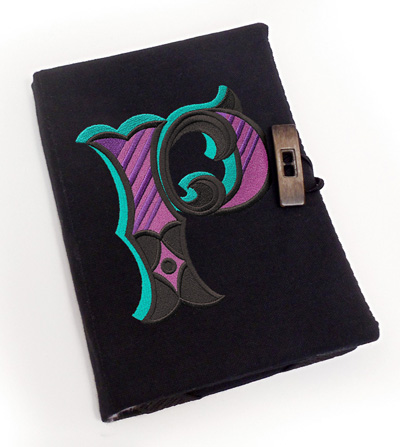
Another great personalized gift for the crafty person is their very own monogrammed, handmade sketchbook. With a fabric cover and a beautiful monogram it’s sure to be a memorable handmade gift unlike anything they’ve ever received before.
Since you make it yourself, you can choose the colors and even the type of paper you use to customize it to the individual. Check out this simple tutorial for how to make it yourself.
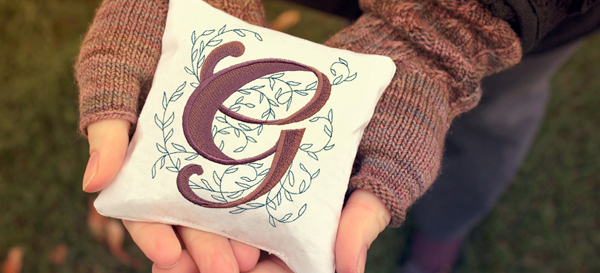
Even these simple little handwarmers get a classy personalized touch with the addition of custom letters. Find out how easy it is to make these elegant gifts.
Everything from full words to simple monograms is just the beginning of what you can make with these Letter Perfect Alphabet designs. Try brightening up your decor for spring or make a few personalized projects for yourself!


